
How to Shoot HDR Photos with a Point and Shoot Camera
Point and shoot HDR photography is quickly becoming a more viable option, as technology improves.
With the increasing popularity of HDR photography in general, more and more people are starting to experiment with the technique.
This includes everything from different types of HDR software, to HDR iphone apps, and for a growing amount on consumers, HDR with point and shoot cameras.
Traditionally you've needed to have high end cameras with bracketing modes, RAW capabilities and a decent tripod in order to have success with HDR.
However, with high quality phone apps becoming ever more popular we've seen some pretty decent results coming out of iPhone apps – including the native camera app for iphone.
But HDR on point and shoot cameras has often been left in this middle ground where results are spotty at best. Most point and shoots don't have the automatic capabilities of phones, and don't have the easily accessible manual controls that we see in DSLRs.
On a recent trip to Asia, I decided I was going to challenge this theory, and leave my D90 at home and shoot solely with my Canon S110 point and shoot, and my iPhone 5 as backup.
What You Should Look for with Point and Shoot HDR
You can shoot HDR with any point and shoot, as long as it gives you the ability for manual control. Many point and shoots have this buried in menus, so double check to see what your P&S includes.
Before this trip I picked up an open box Canon S110 for $299. A steal of a deal, but if you can find one under $399, it's well worth it as it's one of the best point and shoots I've used (especially when it comes to video). More on that later though.
The reason this one stood out was for it's size, Camera Raw capabilities, and bracketing mode.
For those of you new to HDR bracketing simply means you can take a burst of shots at different exposures. This makes HDR much easier, because you can simply select the bracketing mode, pick how far apart you want the exposures (I usually go for +/- 2 stops to get the highest range possible). On a point and shoot, all you need is one click and the camera does the rest.
I was actually pretty surprised at how well the S110 handled some of these shots, and the results were better than I'd anticipated.
Key things to look for if you're buying a new point and shoot and are interested in HDR:
- Manual Controls – You should be able to separately control shutter speed, aperture, and ISO on your own.
- Bracketing Mode (Most Important) – More and more mid to high range point and shoots include bracketing mode on their cameras
- RAW Capabilities – This essentially allows you to take photos that are much more detailed than the standard jpeg. This can be very useful for HDR as often you can create an HDR image out of a single RAW image, where you'd have to have 3 bracketed images
Some Cameras to Look At
Like I mentioned, you can do point and shoot HDR with any camera with manual controls (skip this section if you already have one you plan to use). However, there are some that are better than others. Here are a few that you should consider if you want to make sure you have something that will perform well:
- Canon S110 ($449.99, my camera). The key benefit to this one is it's size. It's small, can fit in your pocket, and has most of the features you'd want in a high end point and shoot.
- Panasonic Lumix LX7 ($450) – The camera I would have bought had I not found such a good deal on the S110.
- Sony RX100 ($650) – The camera I'd bought if I wanted the best point and shoot on the market.
How Do You Edit the Photos
Originally I was going to suggest using Photomatix Essentials for point and shoot HDR. It's the best solution out there for less than $30, and I wanted to keep things simple, especially for beginners.
Then the more photos I edited, there more I realized, as much as I wanted to make this a beginner's guide to point and shoot HDR – it really isn't the best tool for the job.
Don't get me wrong, it's fantastic software, as you'll see in our upcoming review – but with point and shoot HDR, your photos are likely going to have some flaws and won't be quite as clear as what's taken on a DSLR.
Becuase of this, using a Pro level solution like Photomatix Pro 4 or HDR Efex Pro 2, is going to give you more control to fix those shortcomings and give you the best chance at creating a high quality image.
This image below was actually edited with Photomatix Essentials. Looks good overall, but I just wasn't able to control some of the details in the temple that would have made this photo look even better – this one could also use some noise reduction:
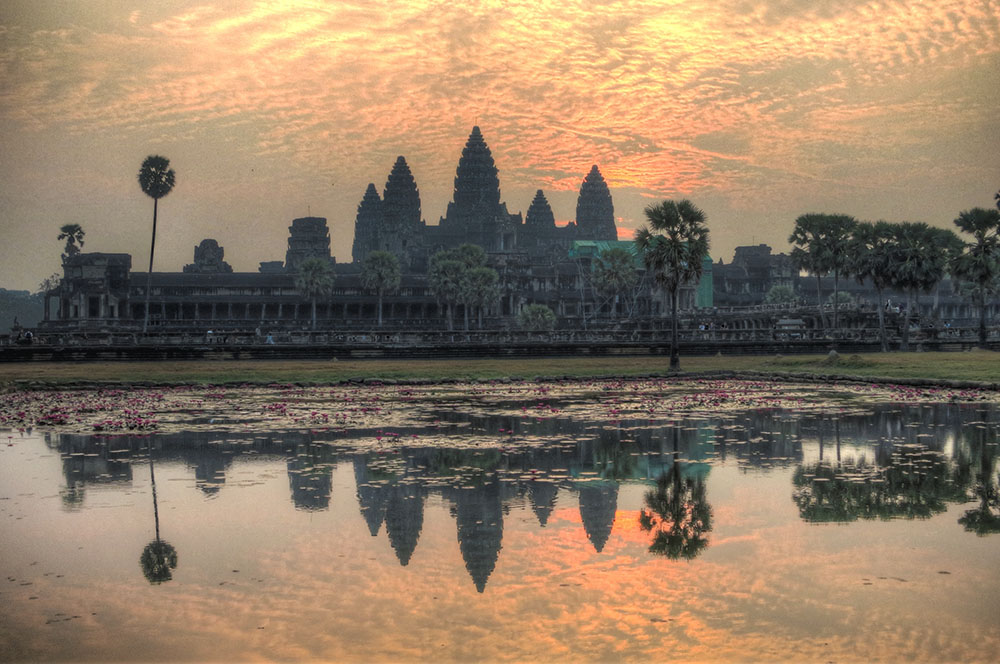
Angkor Wat Shot Bracketed with Point and Shoot and Edited with Photmatix Essentials.
Photomatix Essentials will give you a good result out of the box if you don't want to do much tweaking.
Photmatix Pro however will allow you to get into all of the dirty details of your photo, allowing you to change everything from exposure to levels and everything in between.
Here's an example of another point and shoot edited with the full version:
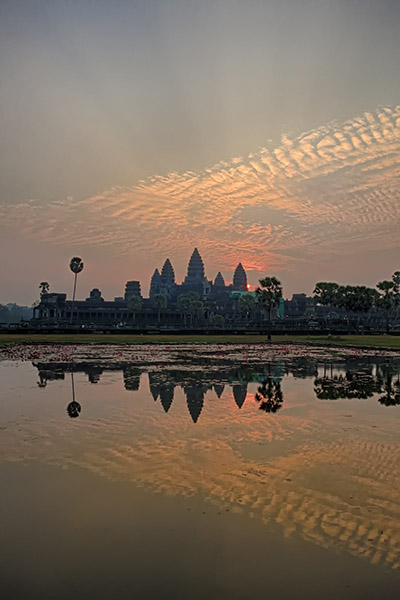
Photomatix Pro 4, along with Dfine 2 by Nik Software is a great combination for HDR editing as well as noise reduction (as noise will be even heavier with P&S cameras).
Note: Use the coupon code “HDRpromo15” to receive 15% off any version of Photomatix or any Nik Software.
Some Examples of HDR Photos with Point and Shoot Cameras
So now that you know what to look for with a camera and how you're going to edit, let's go through the actual process of shooting HDR on your point and shoot.
It's a pretty simple process, that is basically identical to doing it with a DSLR.
1) Set Up Your Camera on a Tripod
Because of the lighter profile of point and shoots, it's more difficult to balance correctly – which makes a tripod even more important than it is on a DSLR.
This is a great example of do as I say, not as I do, considering most of the HDR from this trip was handheld. My results would have been even better had I taken the time to do this, but part of my reason for leaving the DSLR at home was to minimize the stuff I was carrying.
If you do forgo the tripod, at least try and find a way to prop up or secure the camera.

Sunset in Guangzhou, China. HDR shot with Canon S110
2) Set to Aperture Mode
This is where a lot of people will make mistakes by leaving their camera set to “auto” or “P”. Why is this an issue? Because when your camera is shooting at different exposure levels, it will adjust the aperture to compensate.
This will give you differing levels of depth of field, causing different areas of each photo to be in or out of focus. When you then combine the images, they become much less sharp.
A point and shoot is also not going to give you the option for really high depth of field options like a DSLR, so I usually try and set it at f/6.3-7.1 depending on the scene at hand.
If you have a little more experience you can set the controls manually in “M” mode, but getting everything dialed in can be much more of a challenge.
3) Turn on Bracketing
On most point and shoots this is buried in a menu, but if you're shooting a lot of HDR you can often set the control ring to bracketing, making it easier to transition into that mode.
If you have a tripod and are going to take multiple brackets for one image you can shoot +/- 1 stop, but I shoot +/- 2 95% of the time.
4) Turn on RAW Mode (Maybe) – Because of the smaller sensor on your point and shoot, you want all the detail you can possibly get out of your images. Putting it in RAW mode means you're going to have that much more control after the fact.
This might add a little bit of processing time since RAW files are generally 3-4 times larger than a regular jpeg, but both Photomatix Pro and Photomatix Essentials have capabilities for processing RAW files.
If you're concerned about having difficulty with these files later on, you can shoot in RAW + jpeg. This will fill up your memory card quickly, but if you're concerned about missing out on that perfect shot, it's better safe than sorry.
Not to mention the fact storage is so cheap now, that it's really not much of an issue.
4) Compose the Shot
Set up your shot on the tripod, and whenever possible make sure the movement with in the scene is kept to an absolute minimum to reduce ghosting and other processing issues.
5) Turn on Self Timer
Since you probably aren't going to have remote shutter control for your point and shoot, you'll definitely want to set the self timer to take the brackets. The two second function should usually be enough, and this just ensures there's not excess movement to the camera or tripod that will result in movement between frames.
6) Take Photo
Take the photo! Often I'll take a photo of my hand before or after a bracket so that when I'm editing and processing I don't have to decipher which images are part of which set of images.
What About “HDR” Modes on Cameras
You might be saying to yourself “my camera has an HDR mode, why dont I just use that?”
In short, because it sucks.
I have yet to come across an automatic HDR mode that really does anything worthwhile – including in my Canon S110. There was no depth to the images, and it barely seemed to add any dynamic range to the image.
I'm curious to see how the latest DSLRs with built in HDR like the Nikon D7100 will do, but until then, if you want to do HDR, do HDR. Learn the process, and your results will be 100x better.
So How Does Point and Shoot HDR Stack Up to DSLR?
So after all of this, and a month of using nothing but a point and shoot, how does it stack up to using a higher quality DSLR camera?
Fair.
Ok, I take that back, fair to good depending on the situation.
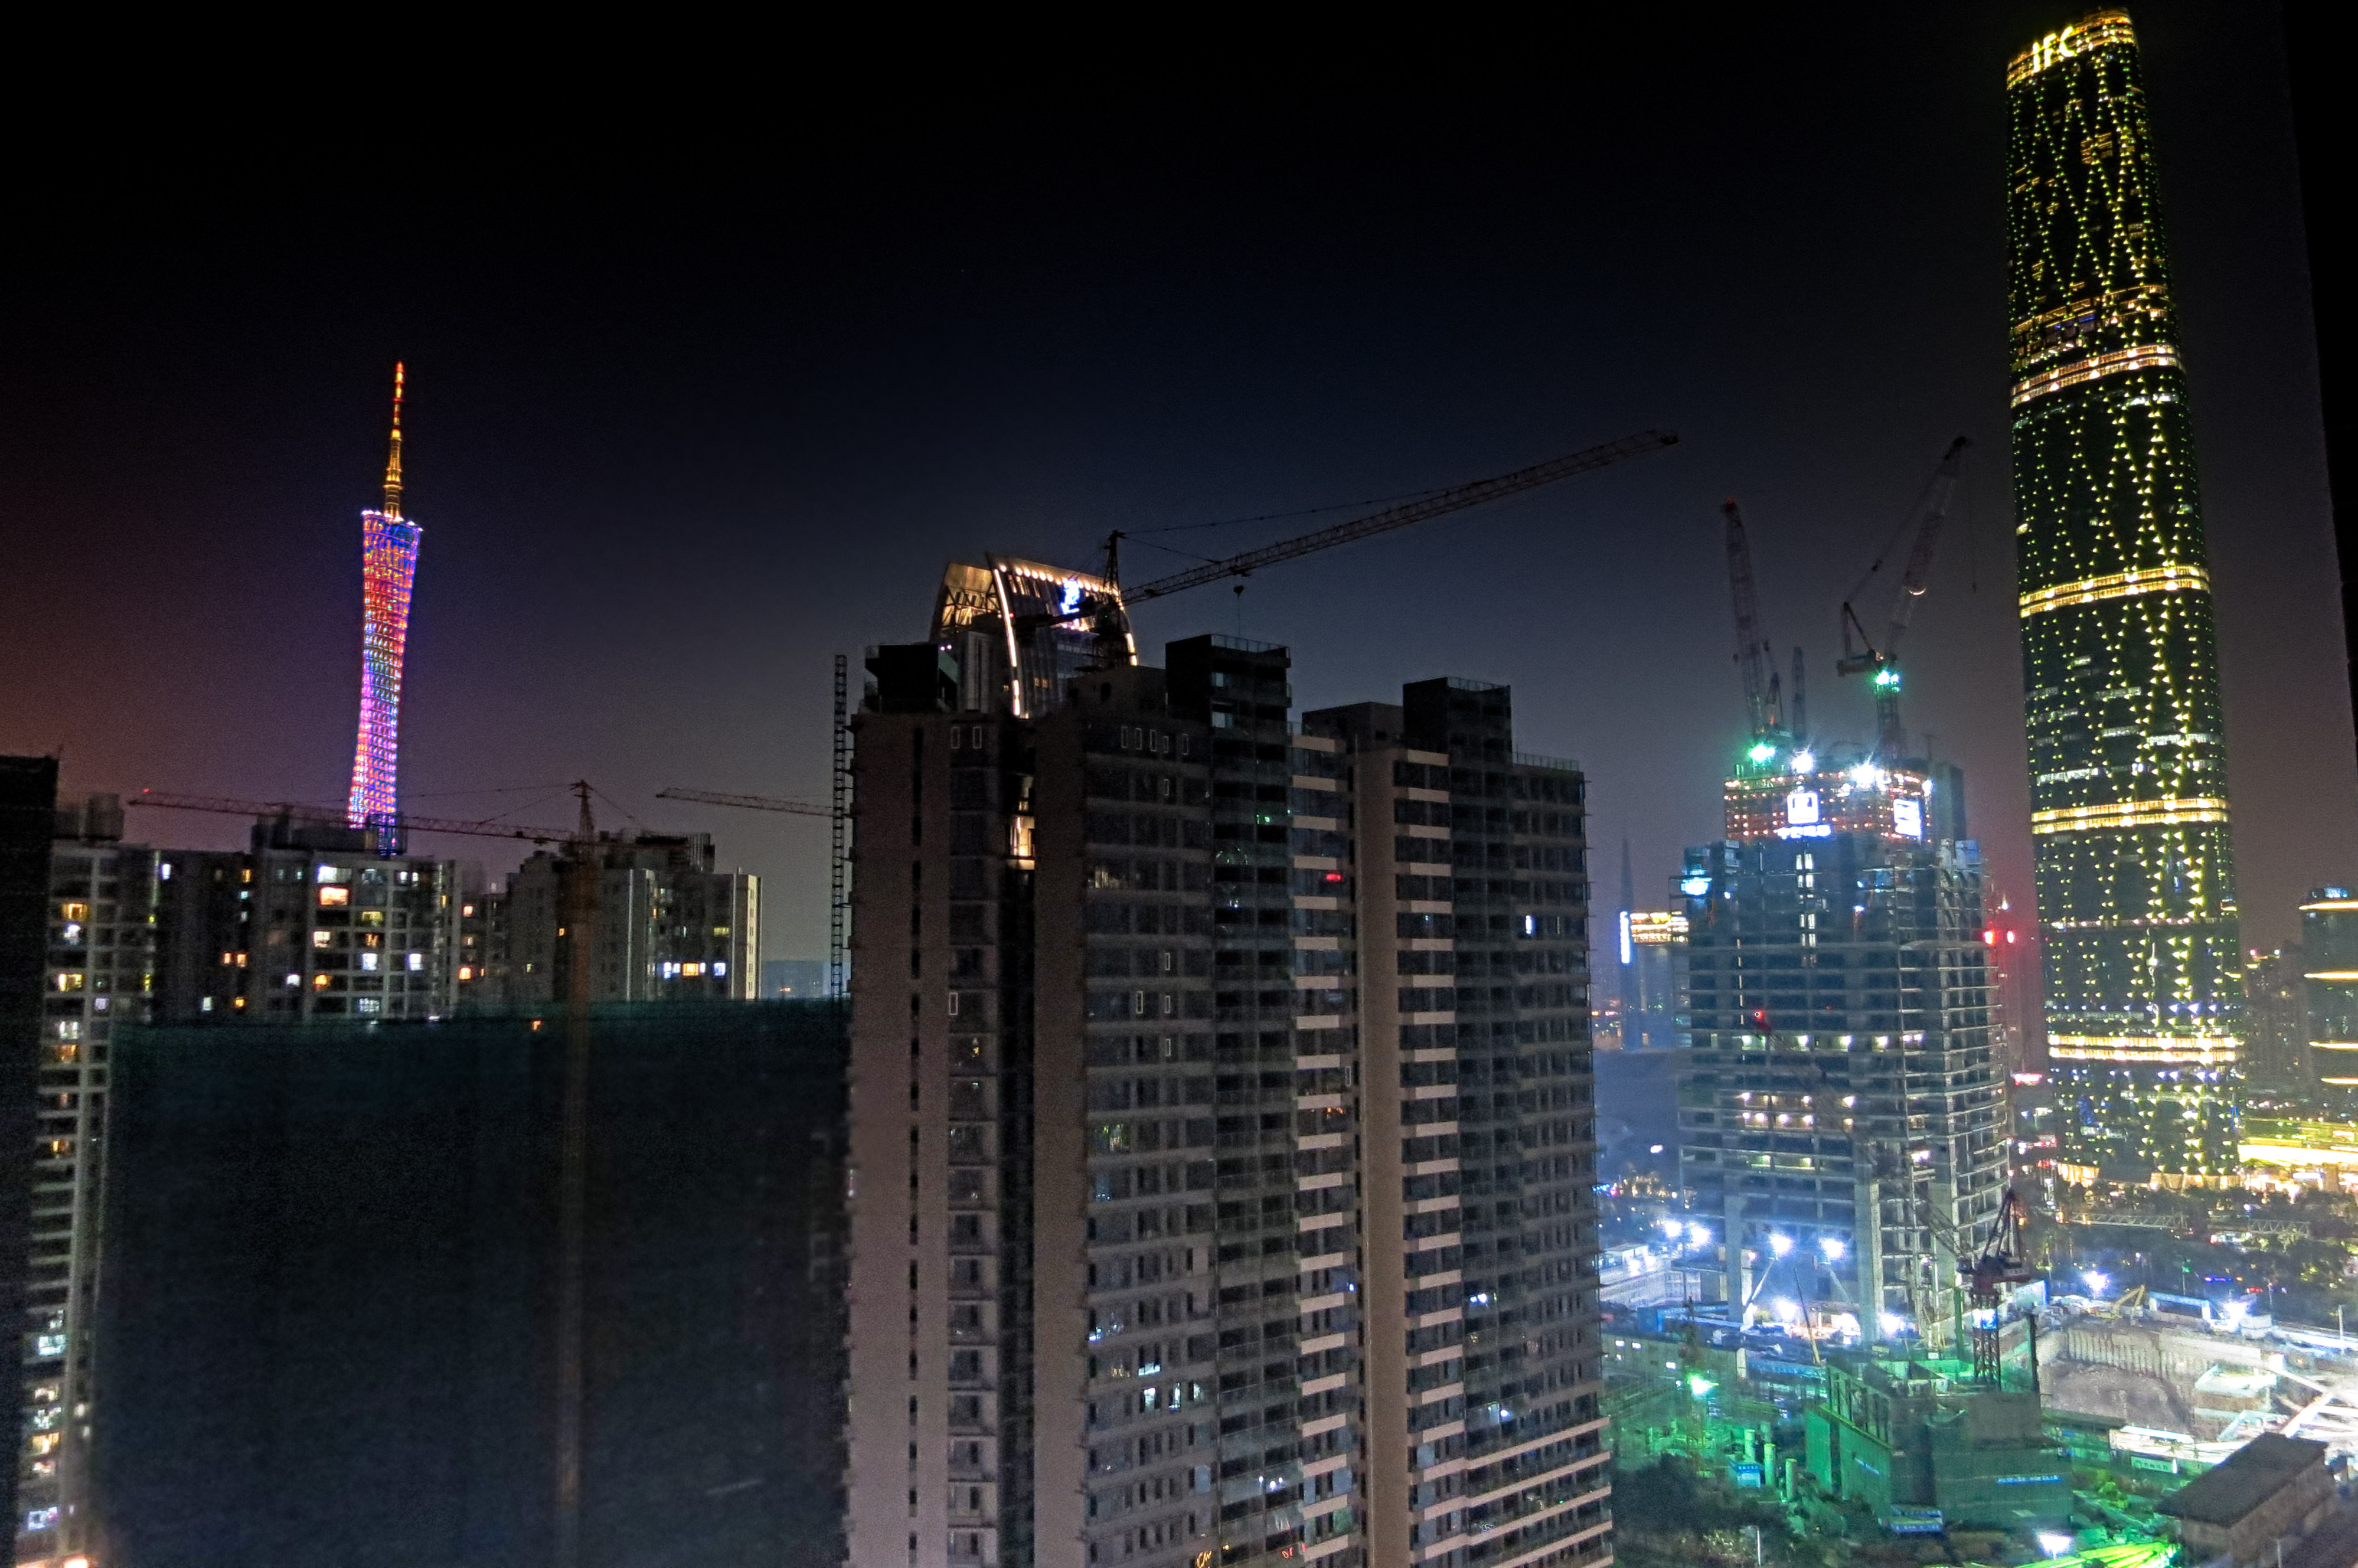
Another Guangzhou shot, this time at night.
In good lighting and with a tripod, my S110 held up pretty well – as evidenced in the previous Guangzhou sunset image. However at night, the smaller sensor makes things a little more difficult and you can end up with some pretty noisy and/or washed out images.
For this one, I used a neutral density filter in HDR Efex Pro to minimize the light bleed in the night sky.
All that being said, considering you can throw a P&S in your pocket and have many of the same features found on a much larger, more expensive camera, it holds up pretty well in good shooting conditions.
The biggest issue I noticed with the point and shoots was focus and clarity. Due to the smaller sensor and lack of full control (even with manual functions), it was difficult for me to get results I was truly happy with.
The images just didn't come out quite as clear as I was hoping. Much of this was because I often tried to squeak by with out a tripod (shame on me!), but thats just the sacrifice you make when going for convenience and portability.
Verdict: In a pinch or if you're on a budget, you can get some good results out of your point and shoot – but you probably won't be replacing your DSLR anytime soon if you want the absolute best quality.
Did you find this information useful? Would you like more information on Point and Shoot HDR photography? Let me know in the comments! I'm happy to write more on the subject if there's demand for it.
Hey! That’s a shot of Guangzhou while they were building the TV tower! Unfortunately I am no longer in China, and they built many new structures (that tower is one) since I left at the end of 2006. I hope to return to China soon, because every day I saw something:
spectacular
weird
amazing
shocking
crazy
funny
China is like no other place on earth