How to Create an HDR Photo Out of a Single RAW File
One of the questions I’m asked most often is what’s the difference between RAW and jpeg, and is it worth shooting in RAW?
There’s no right or wrong answer to this question, but there are a few very important distinctions you should be aware of.
Should You Shoot in Raw?
Essentially when shooting in RAW you’re saving ALL of the information that your camera records of an image, and it’s not altered in anyway. This gives you the most detail possible, as well as some pretty massive file sizes.
Most people traditionally shoot in jpeg format. These are compressed files that are much easier to work with and usually smaller file sizes. Most cameras will also tweak them a little bit to include more vivid colors out directly out of the camera.
Does it make sense for you to shoot in RAW? On a day to day basis, probably not. Unless you’re a professional photographer these photos will probably just take more space than necessary and not look as good directly out of the camera as their jpeg counterparts. So if you don’t want to do a lot of editing to your photos, don’t shoot in RAW.
Not to mention the fact that as camera technology advances and changes, the specific RAW file format your camera outputs, has the potential to be tougher to use in the future.
However, there are times that shooting in RAW can be really beneficial.
For me personally, if I’m shooting a beautiful sunset and doing HDR I will almost always shoot in RAW. Why? Well for one, I know I’m going to be editing the photos later, so I’m not concerned about the additional processing of the jpeg.
More importantly however, is it provides a safety net.
Raw Photo HDR: How to Create an HDR Photo with One RAW File
When doing HDR it’s possible to take 1 RAW image and turn it into 3 HDR bracketed shots.
Let’s say I forget to set my camera to aperture mode and the depth of field in each of my three shots is totally off. If I shot in RAW I can take the shot that’s at normal exposure, create my brackets from there, and still potentially have a great HDR image.
You can’t do that with jpeg.
So, in this article we’re going to look at exactly how to turn one RAW image into a series of 3 jpegs that are ready to be put through HDR software.
Some of my best HDR images were actually taken from one RAW, and this is especially useful if you’re shooting and don’t have a tripod. This is also incredibly beneficial if you’re shooting a fast moving subject. With this, you don’t have to worry about any of the ghost reduction or other processing that cant reduce the quality of your image.
The process is really simple, so don’t worry if you’ve never done it before.
Step #1: Choose Your RAW Photo
Simple enough, right?
If you’re taking this from a set of HDR brackets already, make sure you select the one closest to normal exposure as possible. If an image is a little under or over exposed it can still work, but this will give us the best shot of pulling out the details in the next two brackets.
For this post, I chose a shot from last fall that I took in Brigantine, New Jersey. Brigantine is an island that’s about a 5 minute drive from Atlantic City.
Below is the original RAW photo loaded up in Adobe Camera Raw. Looks pretty dark right? Well, wait until you see what happens just by tweaking the exposure slider a little bit.
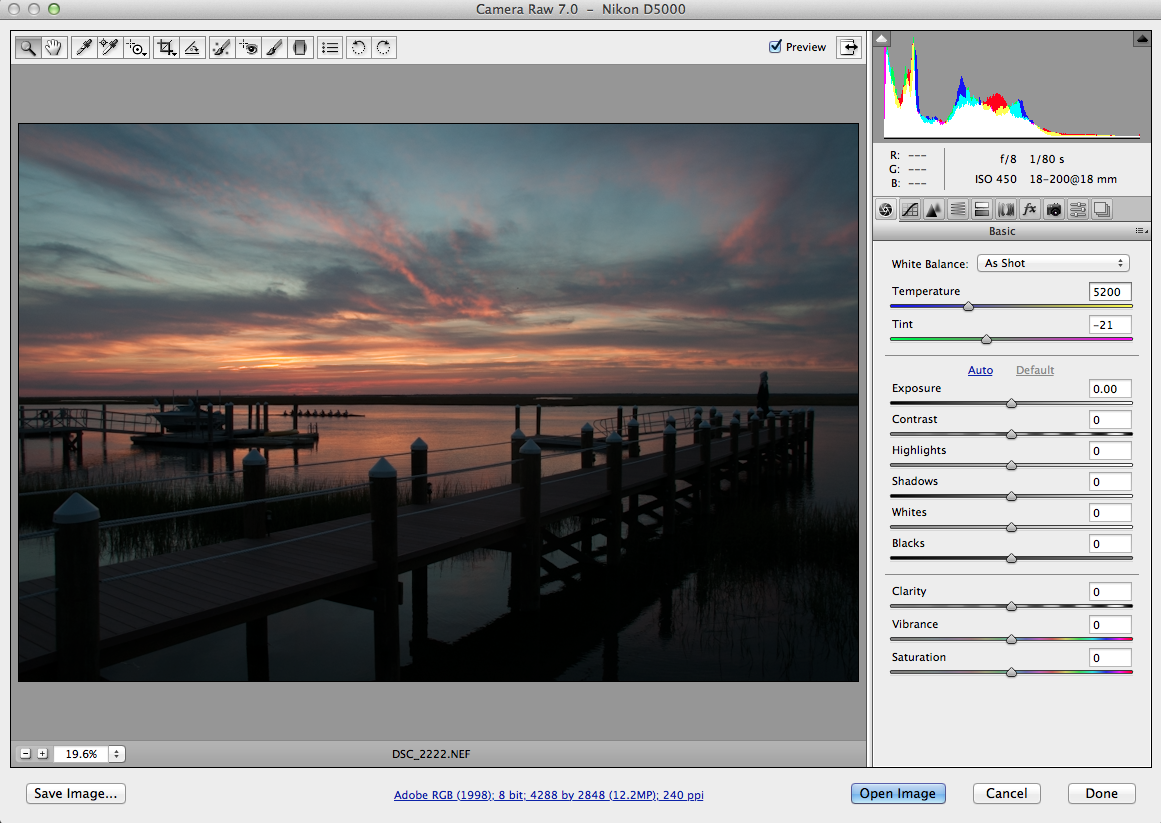
Step #2: Load RAW Photo in Adobe Camera RAW (or Other RAW Software)
I personally use Photoshop to edit my RAW photos, but there are a lot of other alternatives out there. We don’t need to do anything crazy, just edit the basic essentials of the photo, so whatever you generally use will be fine.
In Photoshop all you have to do is open a RAW image and it will pop up in Camera RAW. Make sure you have the most up to date version, though. I recently picked up a Canon G7X and shot some RAW images with that, and when I went to process them I realized I didn’t have the most up to date version and was unable to edit them.
Step #3: Adjust Exposure to -2 and Save as Jpeg
Once the image is loaded, find the slider for exposure. Set it to negative 2. Now save this image as a jpeg and label the file name as such (ie ____ HDR Under)
Step #4: Repeat step 3
Now repeat step three one more time, except this time set the exposure to +2 from the original file. Now save as _____ HDR Over)
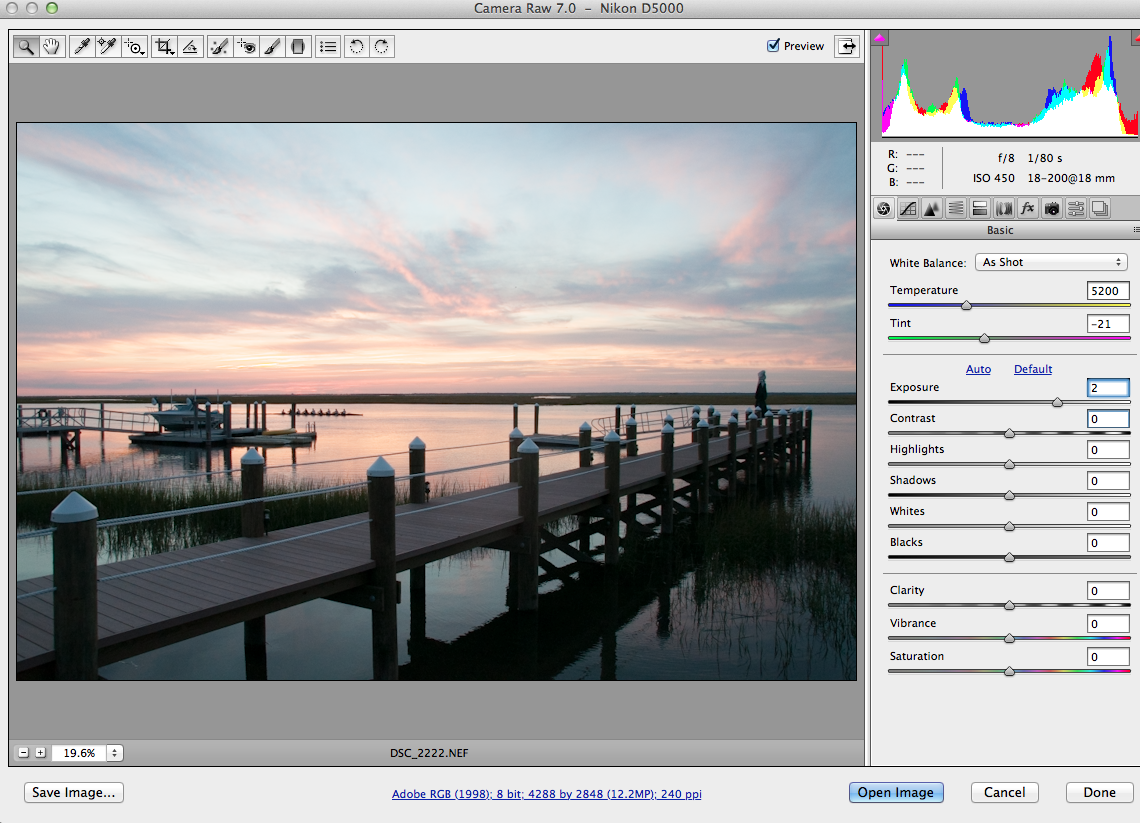
Overexposed Version of my RAW photo
Step #5: Save Original File as Jpeg
To finish it up, just save a version of the original file as a jpeg and label it ____ HDR Normal.
Step #6: Load your brackets into HDR Software
That’s it! You’re ready to roll. All you do from here is load your new brackets into your HDR software of choice and you’ll be good to go.
We generally recommend Photomatix Pro 6 as the best piece of HDR software on the market, so if you’re trying to figure out what is best for you, I’d take a look at that.
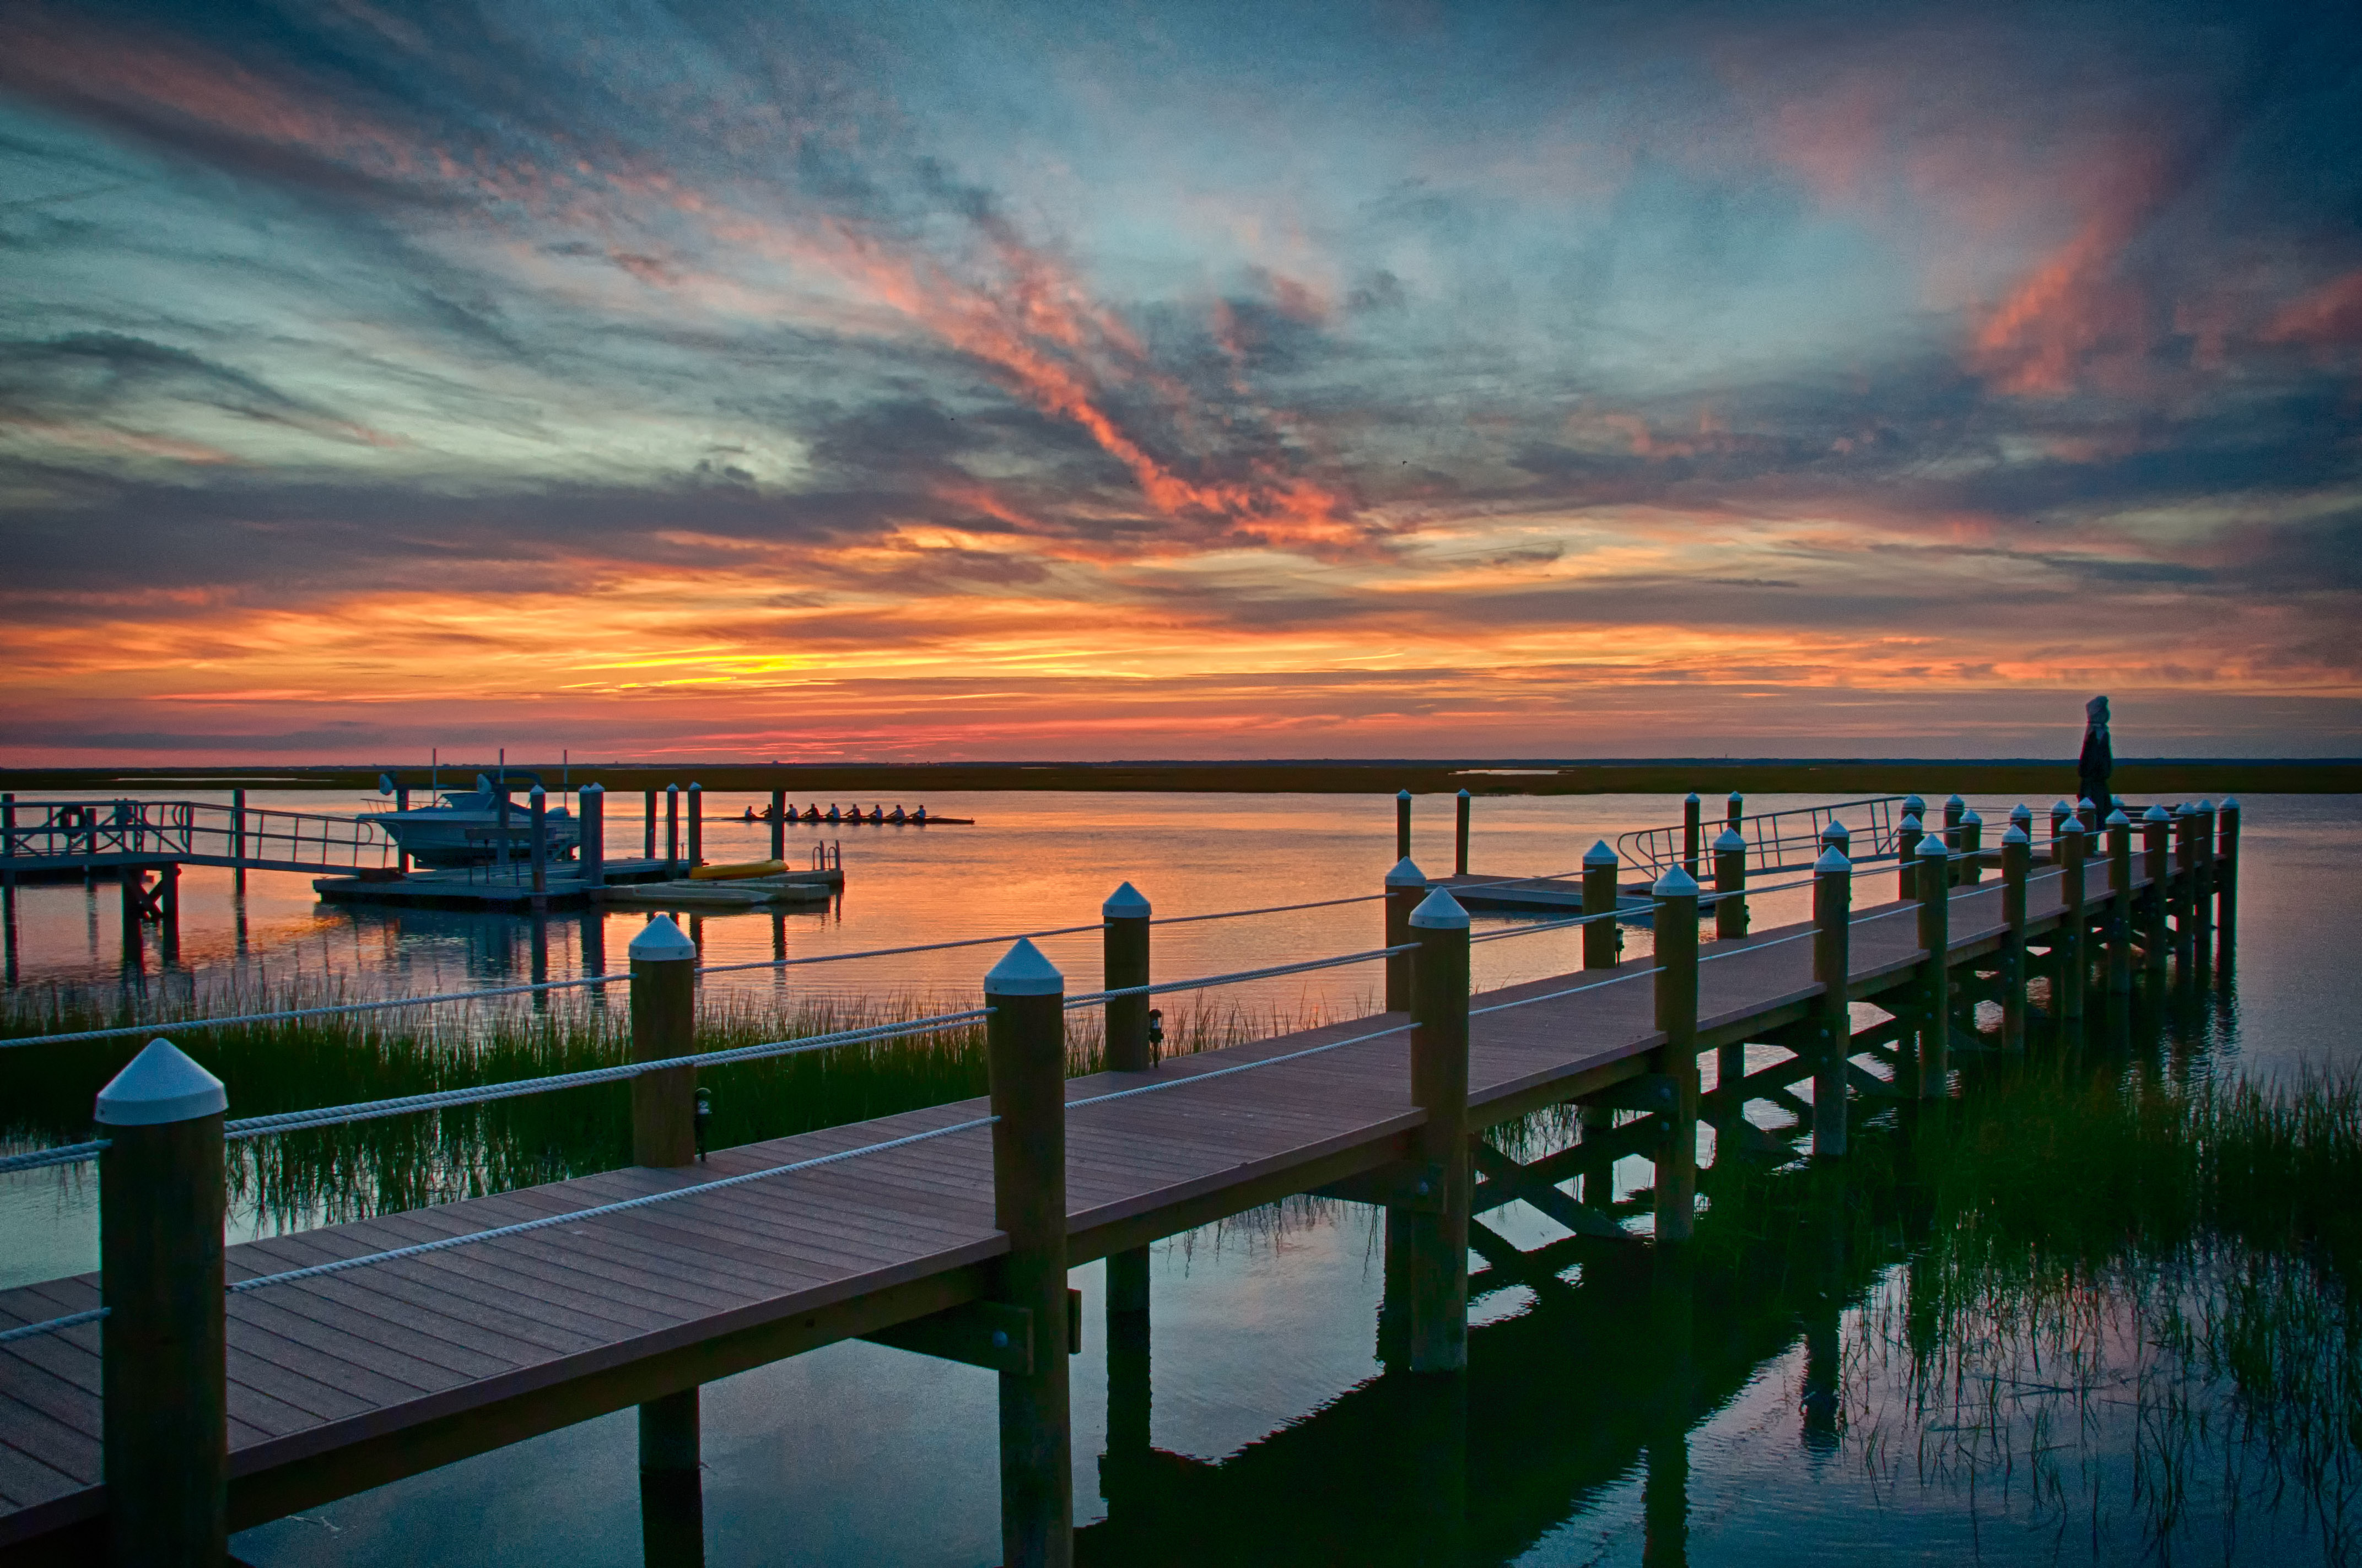
Here’s the final result after editing the photo:
Good luck and if you have any questions on how to do this, just drop a note in the comments section!
Is there any disadvantage to using a single RAW shot and creating an over and under exposed shot in processing and using those 3 to create an HDR shot versus taking 3 bracketed shots with your camera?
Iam very new to photography and owned a Nikon D80 , but to be truthful never understood much about camera basics. I really enjoy taking pictures and the one thing I believe that I have in my favour is a keen eye. I just upgraded to a Nikon D7100 and Iam trying to master even the basics. Its guys like you that give me encouragement clear and easy to follow steps. I have shot a couple of London scenes but compared to yours well no contest .. you win hands down will follow your links in the future , thanks for taking the time to help others..Dave English
Thanks for the article. I am working with Photomatix and found that the results are by far better when processing .tif files instead of .jpg;