Silver Efex Pro 2 Review
Use the promo code “HDRpromo15” for 15% off Silver Efex Pro and the Rest of the Nik Collection
There are probably hundreds of different programs on the market that will create a black and white image from a color one. After all, how hard can it be to simply strip the color out of a picture?
But if you’re as big a fan of black and white photography as I am, you know that it’s the subtleties and nuances that take a shot from simply being monochrome to being something worth hanging on your wall.
After using a variety of programs to process my black and white work, and in some cases, more than one on a single image, I think I may have found a great one-stop-shop alternative in Silver Efex Pro 2 from Nik software.
In this Silver Efex Pro 2 review we're going to look at all of the different features and how they work together to create one of the best photography plugins on the market today.
I wanted to get a new image to put Silver Efex through its paces and (living in the Portland, Oregon area) decided run out to Multnomah Falls in the Columbia River Gorge, on a rare sunny March day in Oregon.
On Easter Sunday.
During spring break.
Probably not very well thought out since everyone in a 3 state radius had the same idea, as Multnomah is the tallest waterfall in Oregon and the largest natural tourist attraction in the state.
So now I have 2 challenges:
- Get a clean shot with a thousand tourists standing in my way
- Try to bring something new to a shot that has been done a million times.
I fought my way to the front of the lower viewing area and started to grab a few frames. I decided I wanted to go for more of a blur effect with the water so dialed back to 1/5 of a second exposure and realized that I'd forgotten my tripod. Not that there was much room to set it up anyway but at this point I decided to take my chances, knock out a few frames hand held and call it a day. Not one of my stronger photo outings, and I was pretty sure the day was a bust.
Once I got home and downloaded the few frames I took, I realized that there were a couple that actually weren’t too bad. Full disclosure here, I took the one I liked best and used Photoshop to “remove” a few stray people from the upper bridge, thus giving me a much cleaner starting point. It actually now looks like I was there on a random spring day all by myself. Go figure.
Here’s the starting image:

Multnomah Falls Outside of Portland, Oregon
So with the backstory in place, Let’s go into Silver EFEX Pro and see what we’ve got…
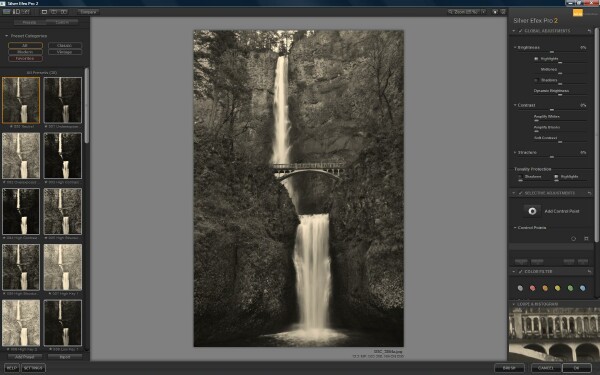
The Silver Efex Pro 2 Interface
Silver Efex Pro (SEP) works as a plug-in to a variety of imaging programs such as Photoshop or Lightroom. I used Photoshop in this case since I had a little “pre-editing” to do anyway (pesky tourists). Load your original image and use the pull down menu in the edit section to launch SEP. A separate window opens on top that is the primary user interface.
For the most part I found the interface pretty well designed and intuitive. Presets on the left, work space in the middle and fine adjustments on the right.
There are 3 different ways to view “before and after” effects as you work: side by side, split screen and toggle (switch back and forth between processed and unprocessed with a mouse click). These all work well and each has value depending on how you like to work. Here’s what the image looked like as it was brought into SEP with the neutral preset:

Opening Screen Neutral Pre-Set
Pre-Sets
There are a variety of pre-sets you can use, some of which (but not all) are very good right out of the box.
There's a good chance you can find one that will get you in the right ballpark even if you decide to fine tune from there (which is how I suspect most people will work anyway). You can also create and save your own pre-sets which can be a major time saver once you figure out how to create images to your personal taste. I was actually pretty pleased with this right away but wanted to bring out some of the detail and improve the contrast.
The default pre-set is neutral which brings the image in with all the fine adjustments nulled.
Global Adjustments
There are two basic adjustment “levels” to understand when approaching programs within the Nik software series.
First are Global adjustments. Global adjustments are pretty much what they sound like: any adjustments that you make will be applied over the entire image. This includes basics like brightness, contrast and structure (what I’d refer to as detail).
Within these controls there are several levels of fine adjustment including highlights, mid-tones, shadows and dynamic brightness, amplify whites, amplify blacks and soft contrast. In most cases global adjustments are the starting point to get your image in good basic shape for fine tuning.
Each category of adjustments can be re-set by clicking the undo button in the upper right corner of each control box. Unfortunately there are no resets for individual fine controls such as highlights or shadows. You have to reset the entire global range.
Control Points
Fine tuning is done using Control Points. This is where Silver Efex Pro really stands out.
Control points allow you to make a wide range of adjustments to specific areas within the frame. You select the “add control point” button, click your mouse on the area you want to adjust and away you go. By adjusting the size of the control point you decide how large an area you want to manipulate.

Control Points
Each control point has its own set of drop down sliders to adjust brightness, contrast, structure, etc. as well as selective colorization. Selective colorization will restore the original image color to whatever area you’ve dropped the control point(s) onto. Here's a sample:
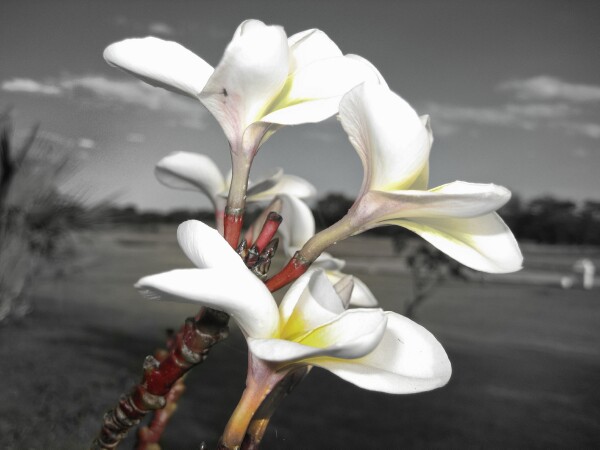
Selective Colorization Using Silver EFEX Pro
Control points can be dragged from one area to another to fine tune which part of the frame you want to adjust. There is also the ability to copy control points if you want to use the same settings on another part of the frame. Additionally, they can be ganged together to operate as a group.
Once you’ve set the right basic size of the control area, I found that they seem to be somewhat “intelligent” and can recognize transitions from one “object” to another within that area.
If you want to adjust the brightness of someone’s face in a shot, it seems to “know” that you want to adjust just that area. That being said, it isn’t perfect and to get fine control in many cases will require you to set multiple control points to get it right. Once you catch on to the concept this tends to be pretty quick and easy.
For this particular shot I kind of liked the moodiness of the relatively low contrast look. I used a “Full Dynamic” pre-set to start then used control points to selectively bring out a bit more detail and definition in some of the darker areas. Here's the finished look:
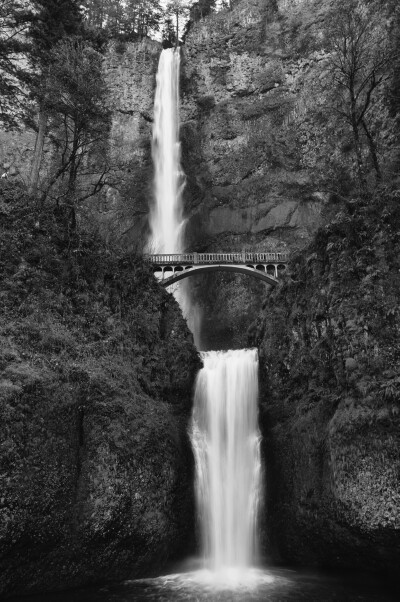
Multnomah Falls Finished Shot
Unique Modes Not Seen in Some Other Plugins
There are a variety of pretty cool modes in here that you don't necessarily see in other pieces of software.
For traditionalist there are color filters available in red, orange, yellow, green and blue that simulate the effect of a hard lens filter using film.
Each is customizable within a broad range of hue and strength. These can be handy to provide broad contrast changes, particularly if you understand how each color effects the image (film school 101 type stuff that probably doesn’t get much discussion these days). One minor gripe; once you click on a “filter” it activates without highlighting so there doesn’t seem to be a way at a glance to see which filter is in play.
Keeping with the old school side of things, are the film stock attributes that simulate some of the most popular film types from Kodak, Fuji and Ilford. By dragging the mouse pointer over the list of stock you can see the changes in real time. Within film types you can also customize the type of grain, the hardness or softness of the grain and relative sensitivity to different “color” channels.
There are a full range of Finishing tools primarily for color wash and border effects. Although a lot of these aren’t to my personal taste they do provide a comprehensive library of sepia variations, vintage effects, vignetting and a lots of border options. If you’re into “old-timey” photo effects, or you're part of the Instagram crowd, this will keep you busy for hours.

Sepia and Edge Effects
Loupe and Histogram
For close up viewing there is a loupe window for working on small areas of the image that you can adjust by dragging the mouse pointer over the area you want to zoom in on. It also includes a handy function to stay locked on to a specific area while you make other adjustments.
One thing I missed on the image size functions was the ability to create variable zoom percentages of the primary image and then be able to drag the image around to the area I wanted to work on. This is just how I like to work and probably won’t be a big deal to most users.
There are also options for dynamic curve manipulation and histograms if you like to work that way. I’ve never gotten comfortable with the concept myself but I know a lot of others do.
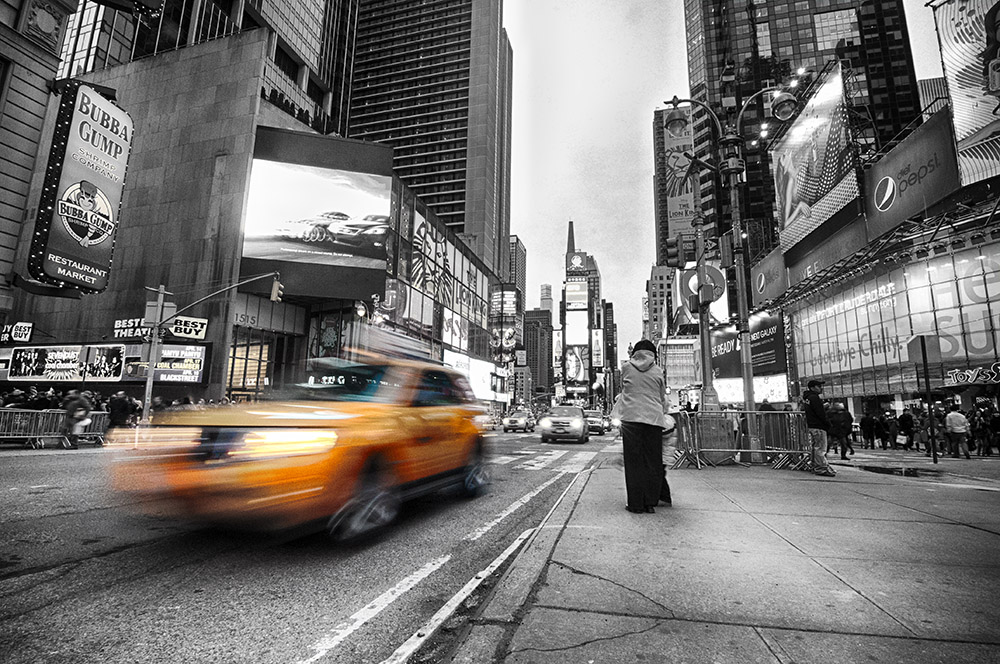
Cab in Times Square – edited with Silver Efex Pr o2
Overall Impressions
For me, this is the only black and white processing software I’ll ever need.
Once I got used to using control points and a couple other features unique to Nik software, I loved the simplicity and flexibility of the design. If I’m in a hurry I can create a few pre-sets that are to my taste, import a shot, press a button and I’m done. If I’ve got an image that deserves a little more time and energy, Silver Efex Pro provides all the tools I’d ever need fine tune it in a virtually unlimited number of ways.
For more on how to use Silver Efex Pro for check out “How to Shoot Black and White HDR Photos”
Use the promo code “HDRpromo15” for 15% off Silver Efex Pro and the Rest of the Nik Collection