HDR Efex Pro 2 Review
Use coupon code HDRpromo15 for 15% off any Nik Software or Photomatix product!
I've been doing HDR for over three years now, and for at least half of that time there really was only one option for editing professional looking photos: Photomatix Pro.
I've used that program and continue to use, it but I was skeptical to say the least when a friend of mine emailed me to say that there just might be some legitimate competition with HDR Efex Pro.
With a bit of hesitation I decided to give it a shot and installed the software.
It was about 17 seconds before my hesitation turned into excitement.
HDR Efex Pro is the real deal, and while it's not necessarily better than Photomatix, it's at the very least on par, and certainly has some advantages.
In this article we're going to compare it directly to Photomatix and help you decide once and for all which one is the right choice for your HDR needs.
The Nik Workflow
I got my first copy of the original HDR Efex Pro a couple of years ago and it was my first introduction to Nik.
As a standalone program I found it lacking, but I LOVED the integration with Photoshop. All of Nik's products work best in the Photoshop environment, and this is a big plus if you use their full suite of tools (I use Silver Efex Pro and Color Efex Pro all the time)
This is a review for HDR Efex Pro 2 however, and they've made quite a few leaps in terms of usability and quality of final results.
First Impressions
I'd spent a lot of time in the first version of the software so I had a good handle on how it worked. This is why it was such a big surprise when I fired up the new version and was met with a screen that I hadn't seen before.
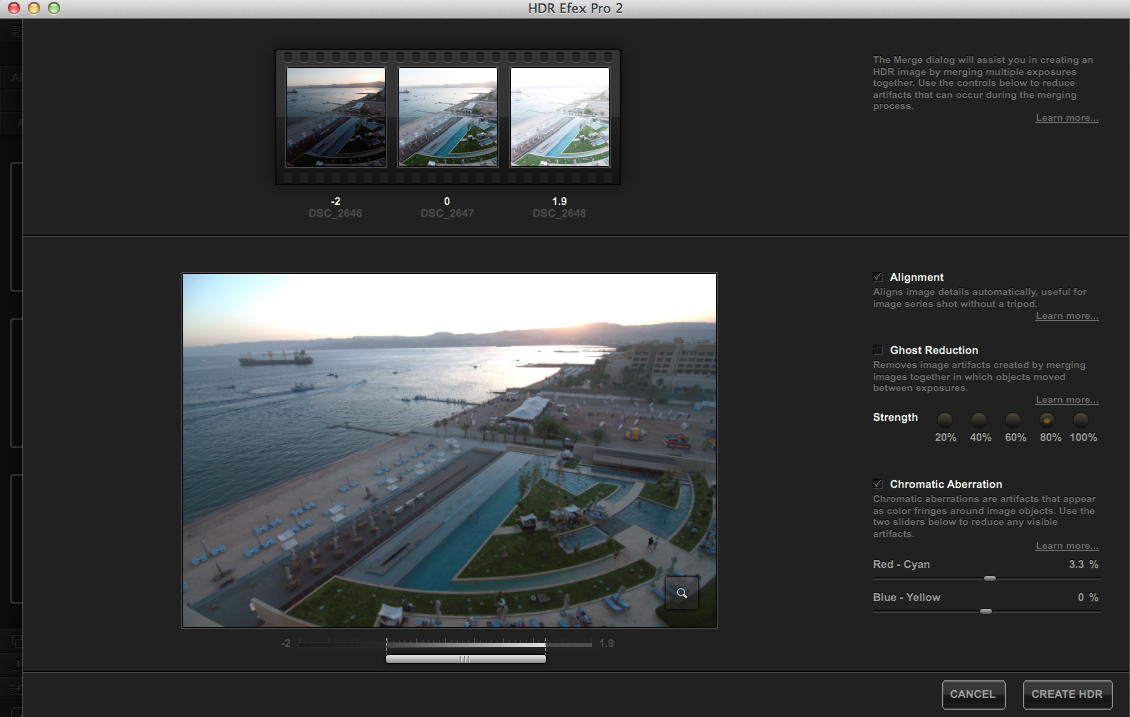
As usual I selected my brackets and then hit the “merge dialogue” button (they really need a better name for this), and then was presented with a screen I'd never seen before.
All of a sudden I had some new options. Namely:
- Ghost Reduction – With control over how prominent I wanted it to be
- Chromatic Aberration – Helping to remove lens defects around the fringes of the photo
- Auto Alignment – Aligning brackets that weren't shot on a tripod
Also more importantly than all of this, you could decide which photo to use as the primary base, and use a slider to adjust exposure on the fly.
This is great for night shots, as well as those in bright sunlight where the scene has a lot of contrast between dark and light.
Within processing two or three photos it was pretty clear just how beneficial this pre-process screen was. I found it to be even more useful than the ghost processing in Photomatix (although you can be more selective with that software), and with every image I've thrown at it, it's exceeded expectations.
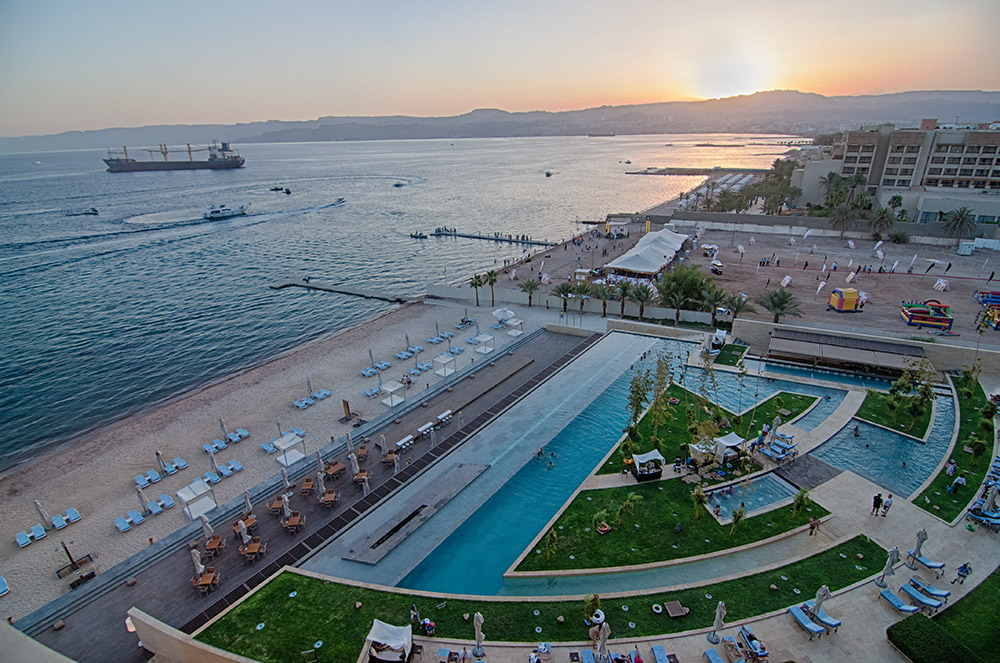
Here's the final version of that photo:
The Editing Process
If you've ever used any of Nik Software's other products, you're going to feel right at home. If you use their products and your're also a Photoshop user then you're really in luck, because their basic tool bar makes it so easy to access any of the plugins you want to use.
I use these pretty much every single day, and am digging into a couple new ones in the near future which I'm pretty excited about.
Once you get through the pre-processing, then you're ready to start getting really creative.
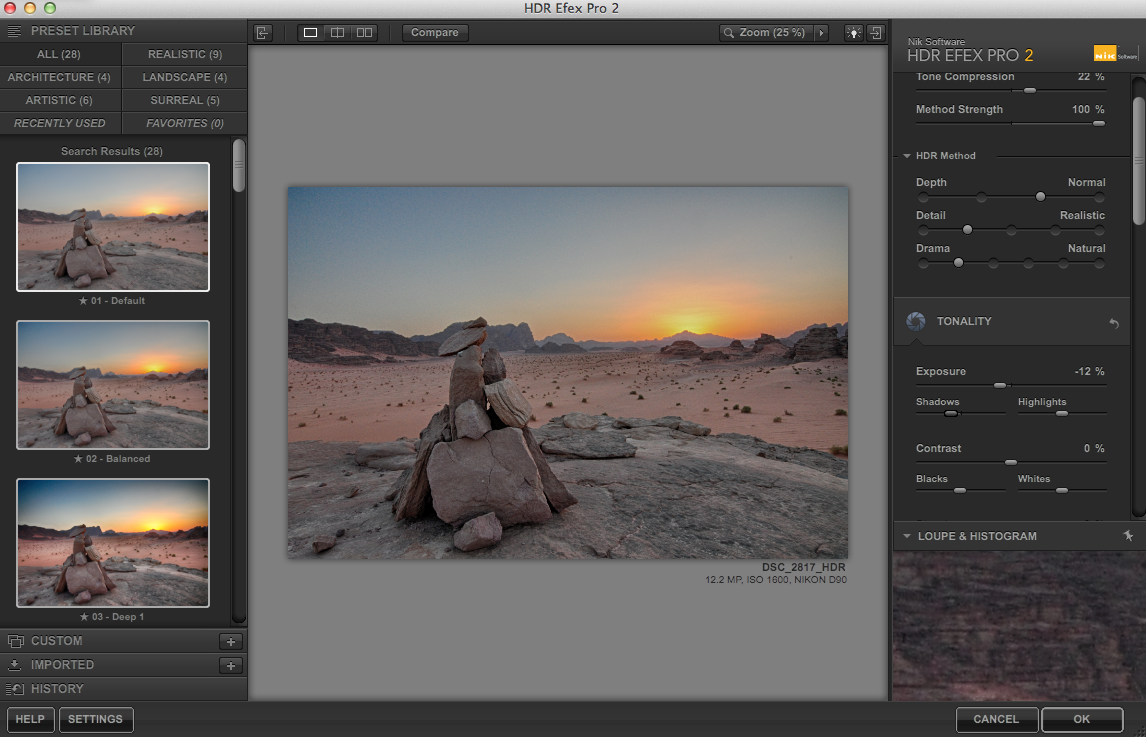
You can select any number of presets over on the right hand side. If you've read my other reviews, you know I'm usually not such a fan of presets, and for the most part that remains true here. I might choose “deep” occasionally, or a couple of others – but I usually prefer to just go with the default process and tweak from there.
As you can see there are no shortage of options:
The one thing that stood out to me with the original HDR Efex Pro, and is only more pronounced in the more up to date version is just how easy it is to do exactly what you're trying to do.
Nik uses unique technology called “control points” that really allow you to fine tune the details of your shot. It does take a little getting used to the system, but in this case it really allowed me to get the sunset exactly how I wanted. I've heard Viveza, one of their other programs, gives you even more control of this – so I'm excited to check it out.
That being said, it works great as it stands in HDR Efex Pro 2. Most importantly, it's user friendly. Other programs have tons of features buried under all kinds of sliders, but here's its pretty apparent what everything does and how it's going to do it. It feels less like I'm aimlessly tweaking sliders, and more like I'm crafting a work of art, which is something I feel few pieces of photo software has managed to accomplish.
It's just as easy to create a realistic looking HDR shot, as seen here:

More realistic Wadi Rum Sunset
…as it is to create something a little more surreal, as we can see with this similar image:

More surreal Wadi Rum, Jordan sunset
You also have a variety of finishing options which are a nice touch. Borders, vignettes, etc. – it's all very easy to do in the Efex 2.
Compared to Photomatix Pro 4
I could go on and on providing you screenshots and examples like many of the other reviews out there, but that's not the purpose of this post. The goal is to provide the person just jumping into HDR to find the best solution for them.
Your big dilemma is going to probably be between three options:
- HDR Efex Pro 2
- Photomatix Pro 4
- Photomatix Essentials 3
So let's try and make this as clear as possible.
If you're considering Photomatix Essentials – just go for that one. It's 1/3 the price of the other options, and is the best entry level option on the market – period.
If you want something that's going to support the creative, and perhaps more professional side of you, then the decision gets a little bit more difficult, as both HDR Efex Pro and Photomatix are excellent pieces of software. If you have the funds for both, then I highly recommend them both and I use each for different reasons.

Wadi Rum, Jordan Sunrise – edited with HDR Efex Pro 2
Later on I'll do a full comparison for the two. But for now:
You Want HDR Efex Pro If…
- You use other Nik Plugins – If you're already familiar with the Nik Universe, HDR Efex Pro fits in perfectly. It integrates beautifully with pretty much any software you'd want to use it with (Photoshop, Lightroom, Aperture)
- You like slightly darker, grittier HDR – When it comes to stormy weather shots, or anything that has darker images, then HDR Efex Pro really seems to excel for some reason, and it's my go to for shots like that.
- Night HDR – Going along with the theme from above, I've had better luck using Nik for night shots. Photomatix can produce shots just as good, but it seemed at times to be a little more difficult to get there.
You Want Photomatix Pro 4 If….
- You Do a Lot of Interior Shots – If you're trying to capture realistic interior shots, say for real estate or other professional work, Photomatix was the winner. It has specific exposure blending modes that make it really easy to capture both clear shots of the interior, as well as keeping the detail and not blowing out the scene in windows.
- You like brighter photos – Just as I like HDR Efex Pro for the dark shots, if you're doing anything in sunlight or other bright lights, I think Photomatix does a better job of capturing those details. Some people go overboard with this when processing, so just be careful not to turn it into an over-saturated mess (with either program)
- You want more online resources – Nik has some great help guides on their site, but if you're looking for more user tutorials then you'll want Photomatix. It's been around longer so generally has a pretty dedicated user base.
Bottom Line
HDR Efex Pro 2 is an excellent piece of software and should strongly be considered to add to your Arsenal. The real beauty of it however lies in it's tight integration with the other Nik plugins.
So you'll get the most value out of this if you pick up the full collection and use them all to give you the most flexibility with your images.
Use coupon code HDRpromo15 for 15% off any Nik Software or Photomatix product!


