
What is HDR Photography: A Complete Beginner’s Guide
Have you ever seen a photo that looks too good to be true?
Like you know something about it is different, but you can’t quite figure out what it is?
Maybe it looks too realistic, or the colors are too saturated, or perhaps it just looks like an over-processed mess?
Well in each of those cases, there’s a good chance you’re looking at an HDR photo.
HDR photography has become more and more prevalent over the last decade or so, and the term HDR is becoming increasingly popular in the public vernacular now that an HDR mode is in just about every phone, and HDR enabled TVs are all the rage.
But as it gets more popular, for most people, it just means that understanding what HDR is only becomes more confusing.
Never fear!
In this guide we’re going to answer the question what is HDR, show you how to get started with HDR photography, and also touch on some of the latest developments with HDR video and HDR TVs.
So with that, let’s jump right in!
What Does HDR Mean?
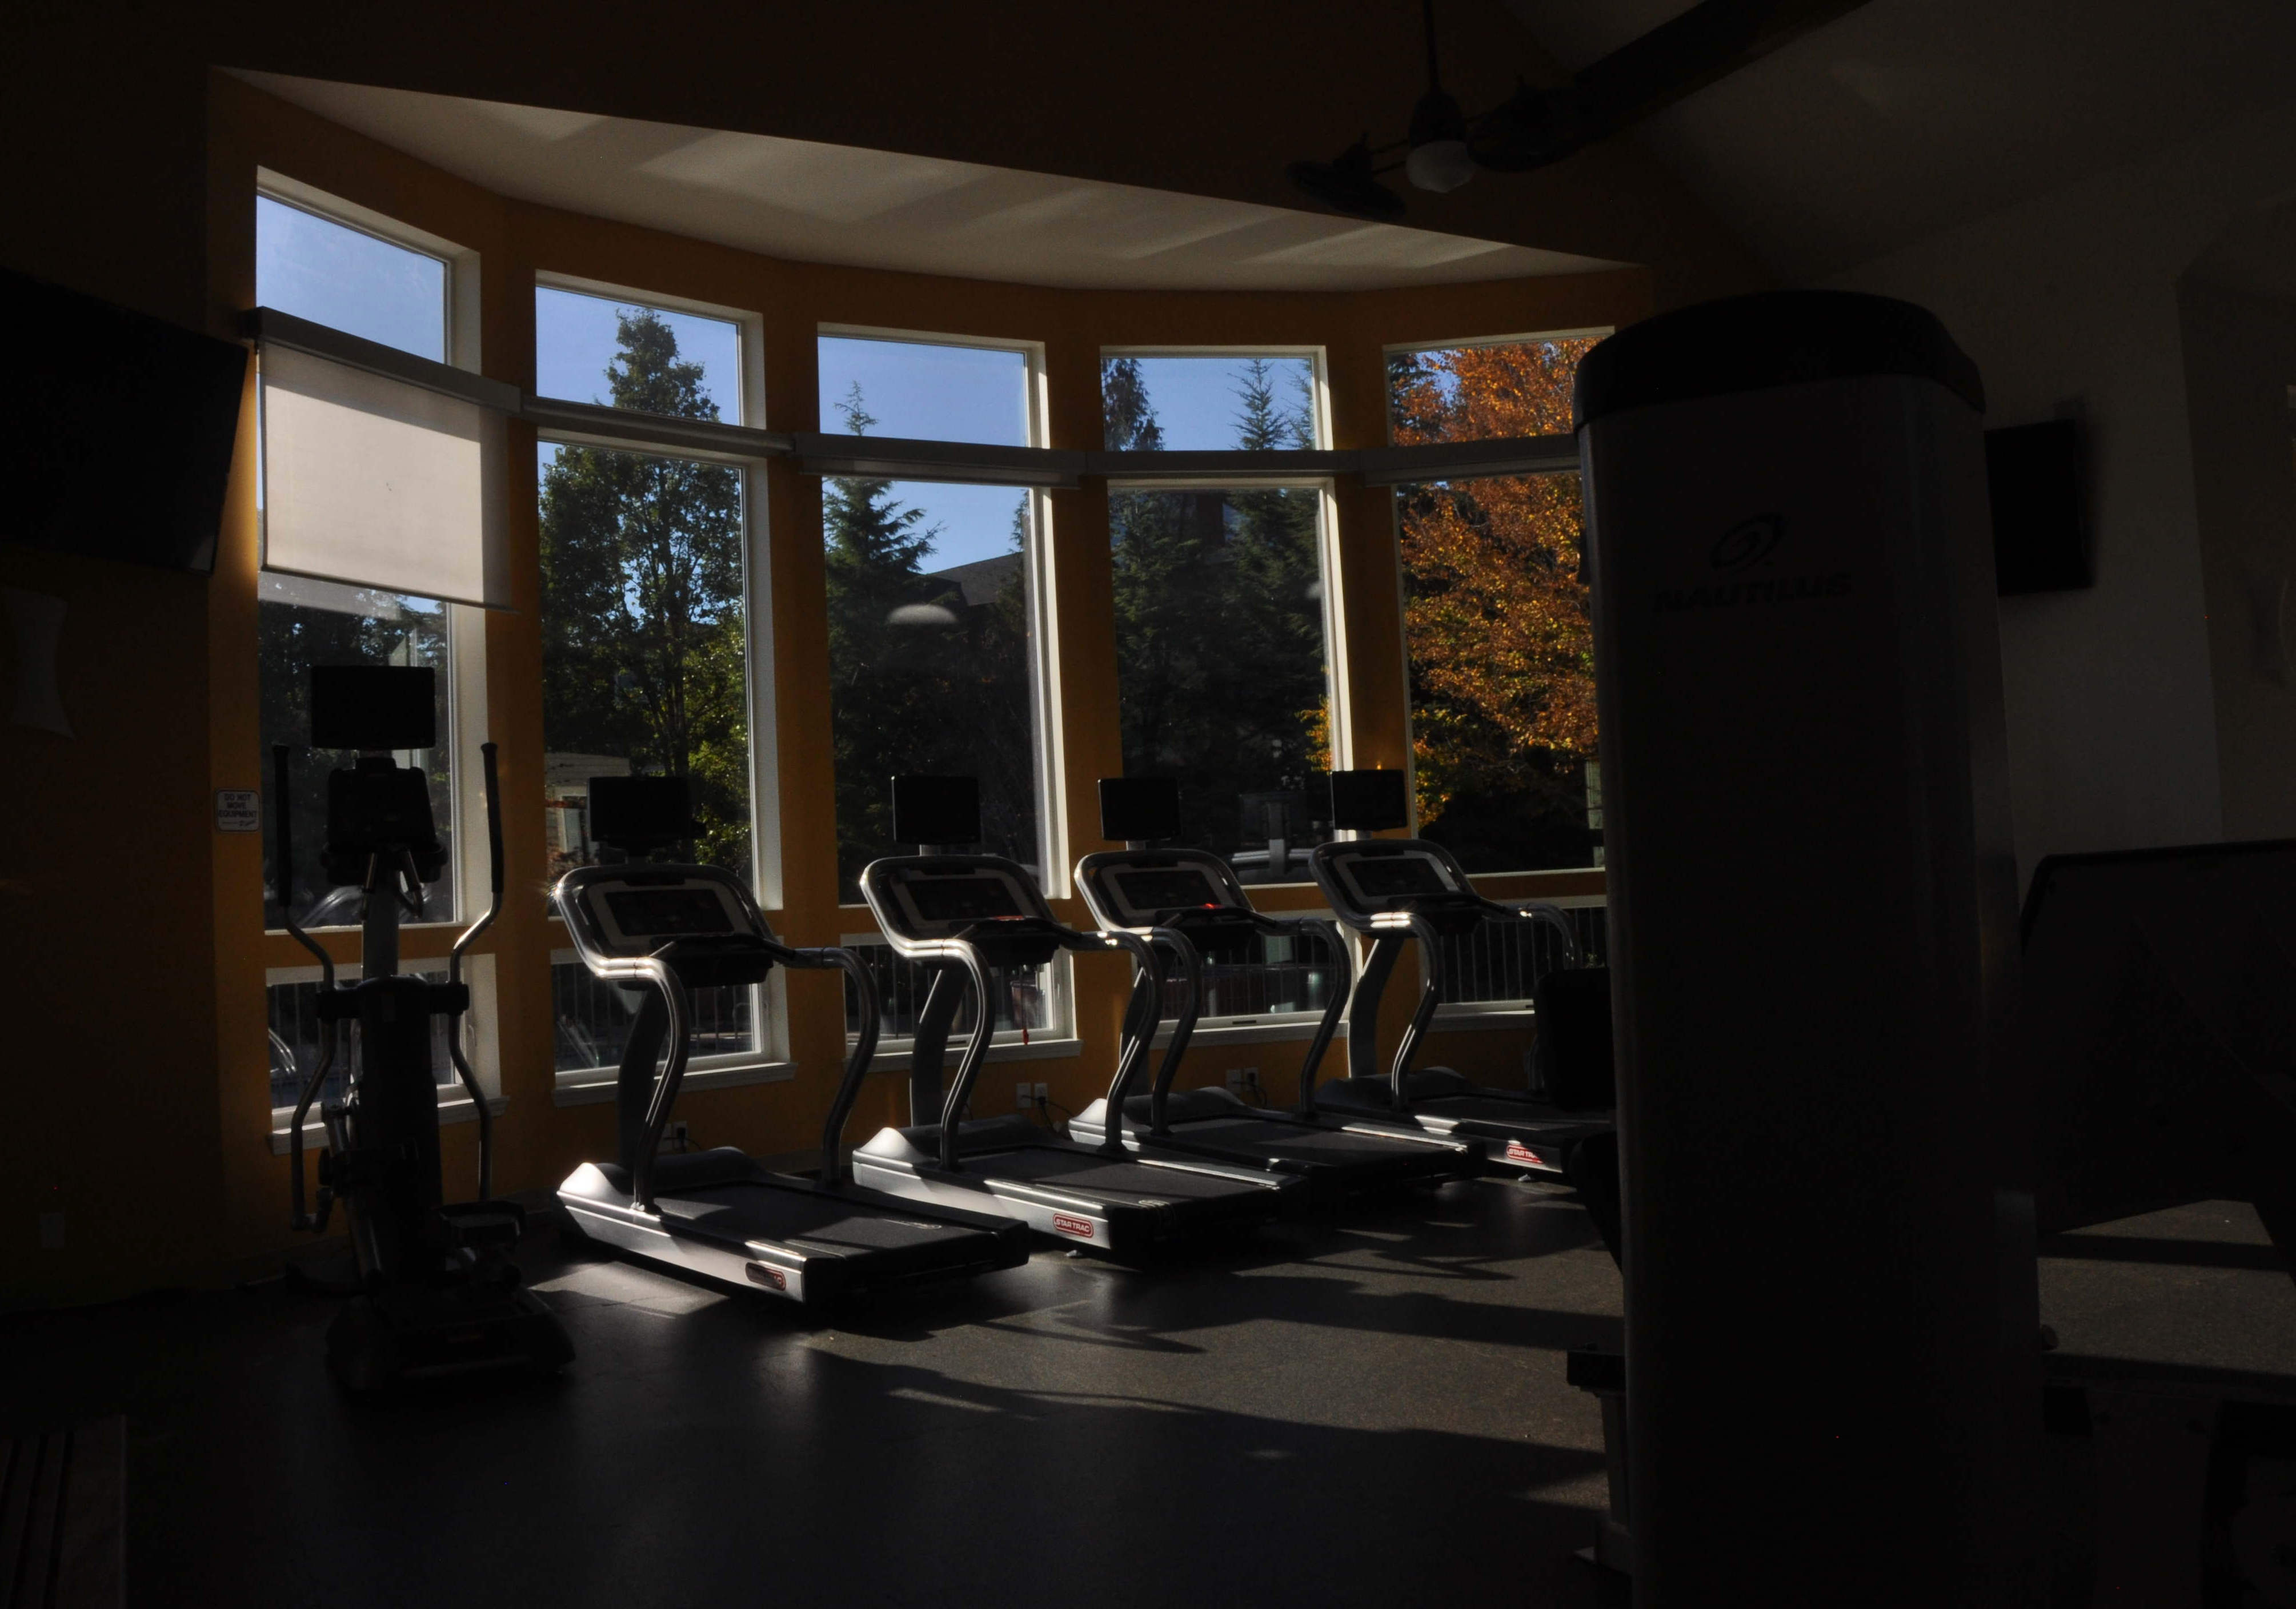
HDR stands for High Dynamic Range. In simple terms, this means there is broad range between the lightest and darkest areas of an image. Think about a person standing indoors in front of a window on a bright sunny day. The window is very bright and the person inside is relatively dark in comparison to the window.
This is an example of high dynamic range.
What is HDR Photography?
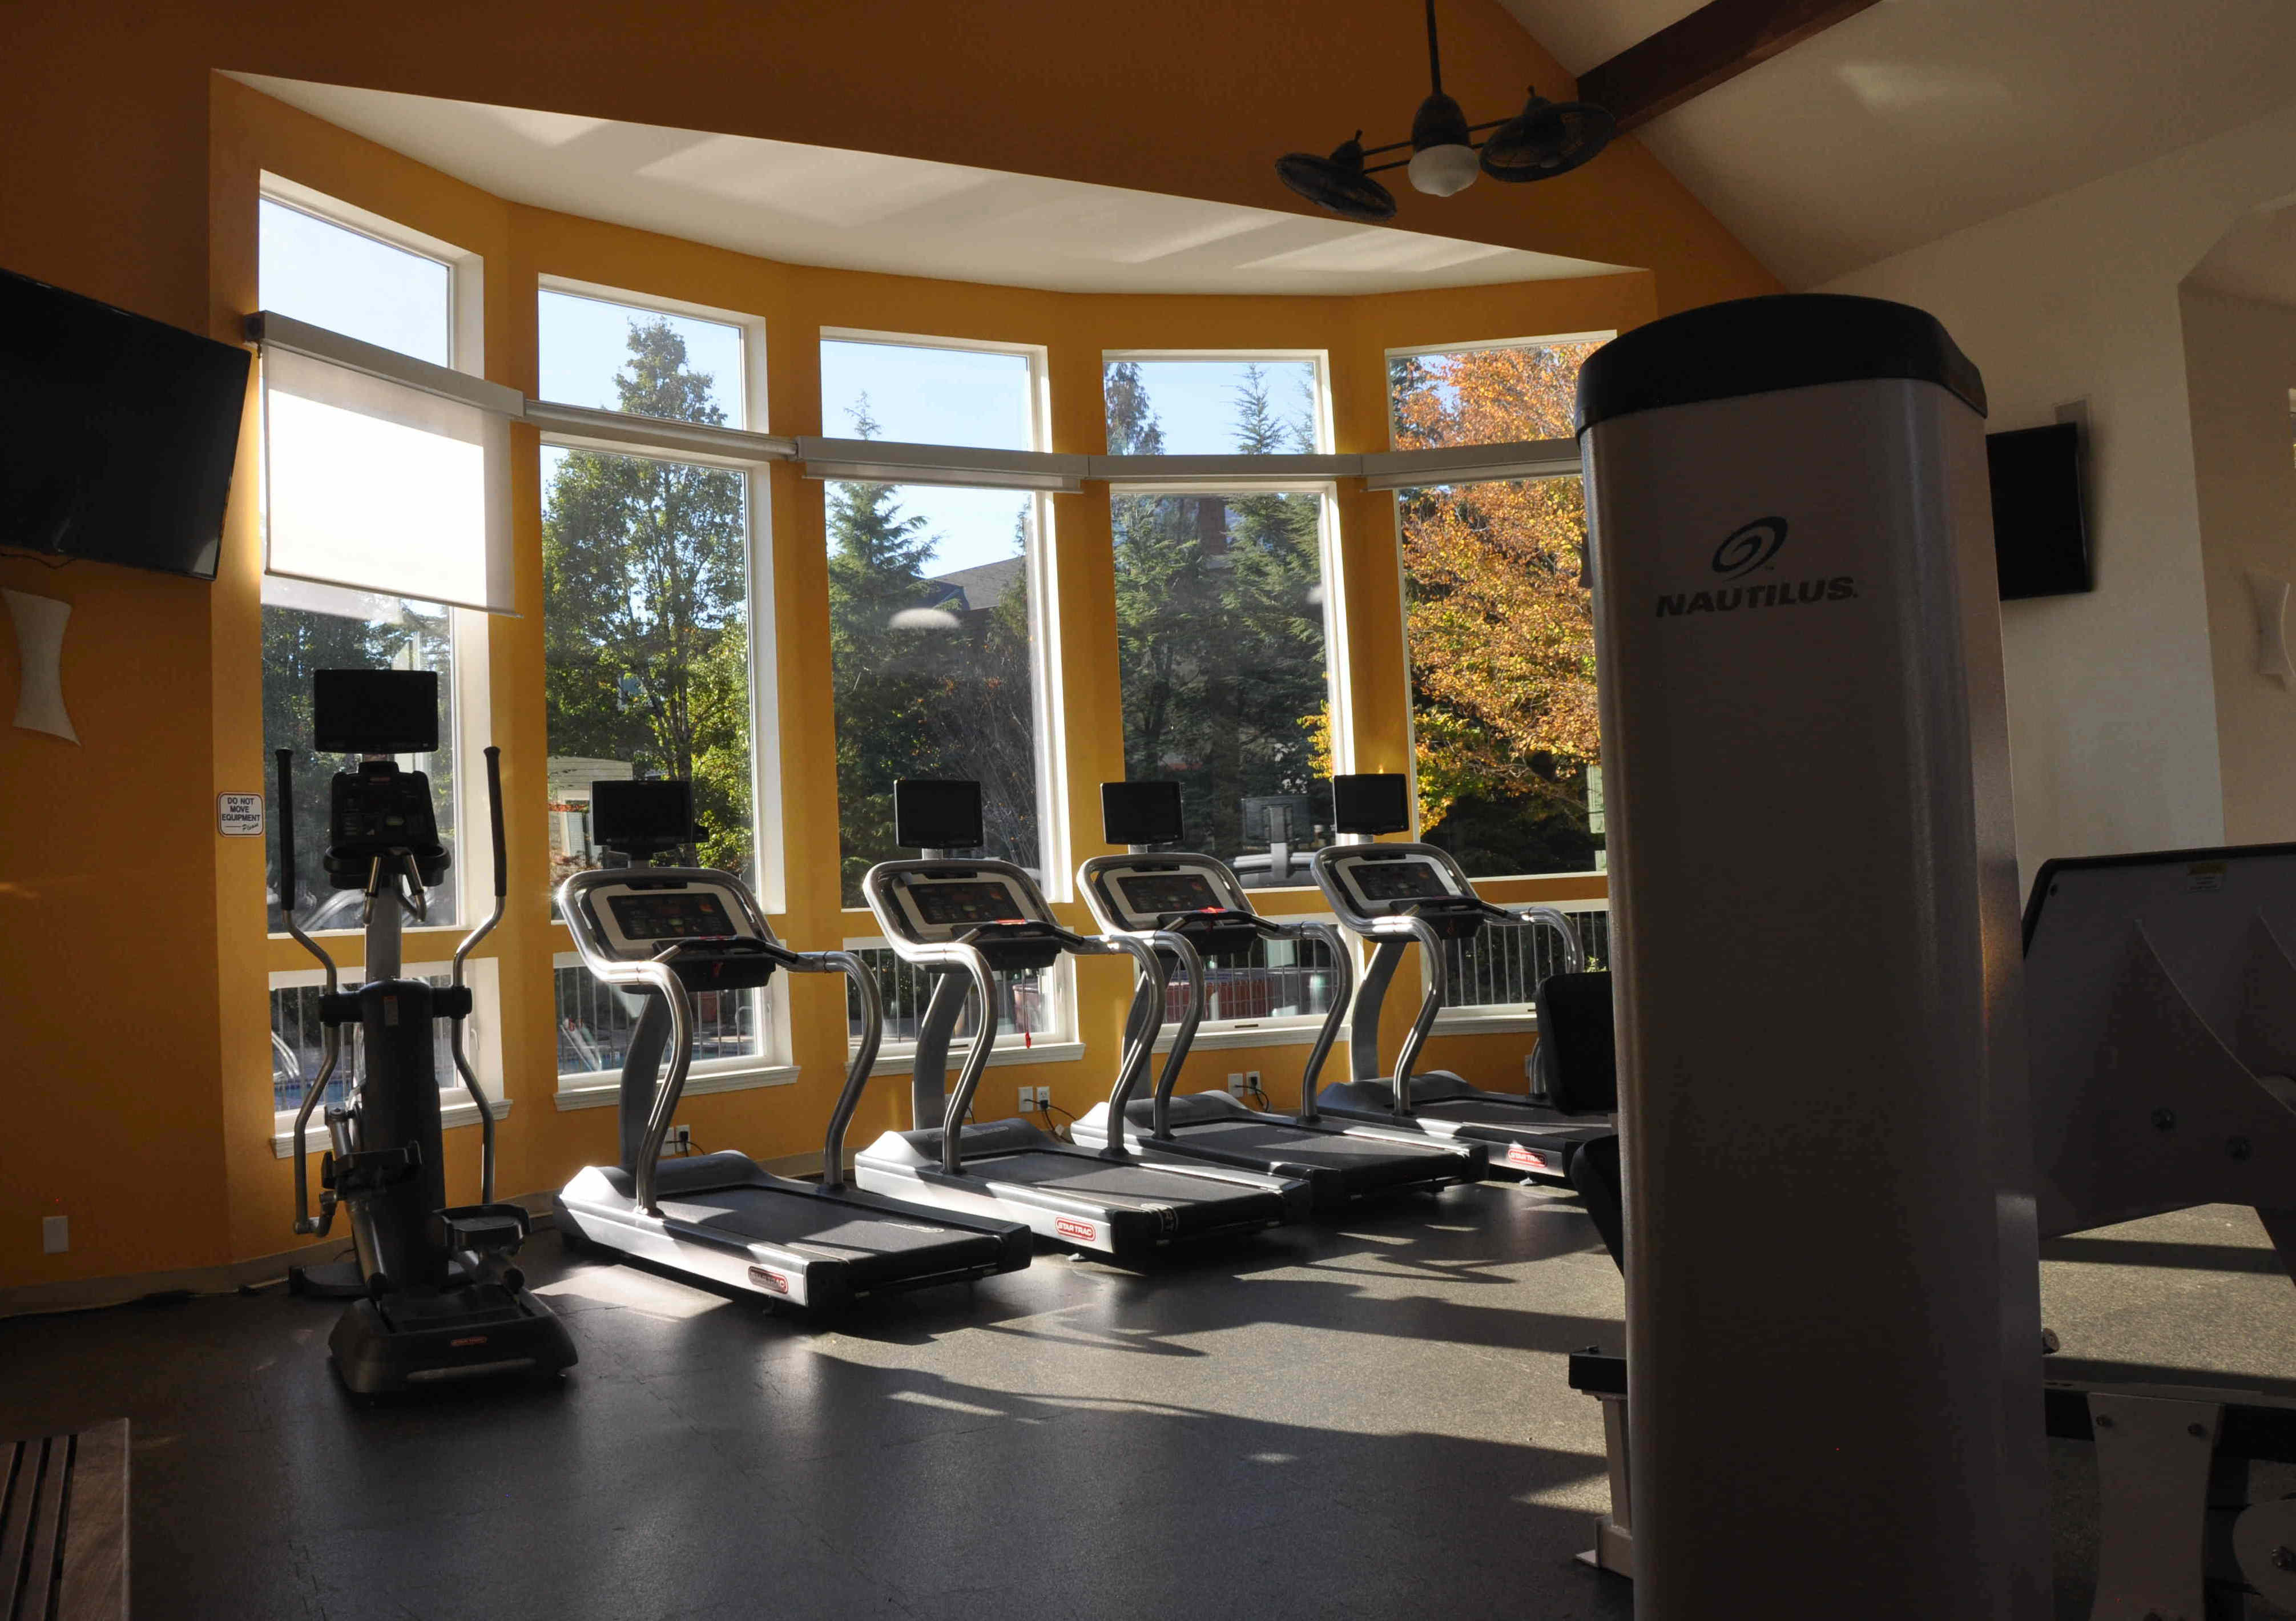
HDR is a technique that takes a group of images, each with different exposure levels, and combines them into a single image that contains more definition and detail from the shadows to the highlights than you’d otherwise get.
In a sense it helps creates an image that is closer to what you see with your naked eye than what you’d get with normal photography techniques.
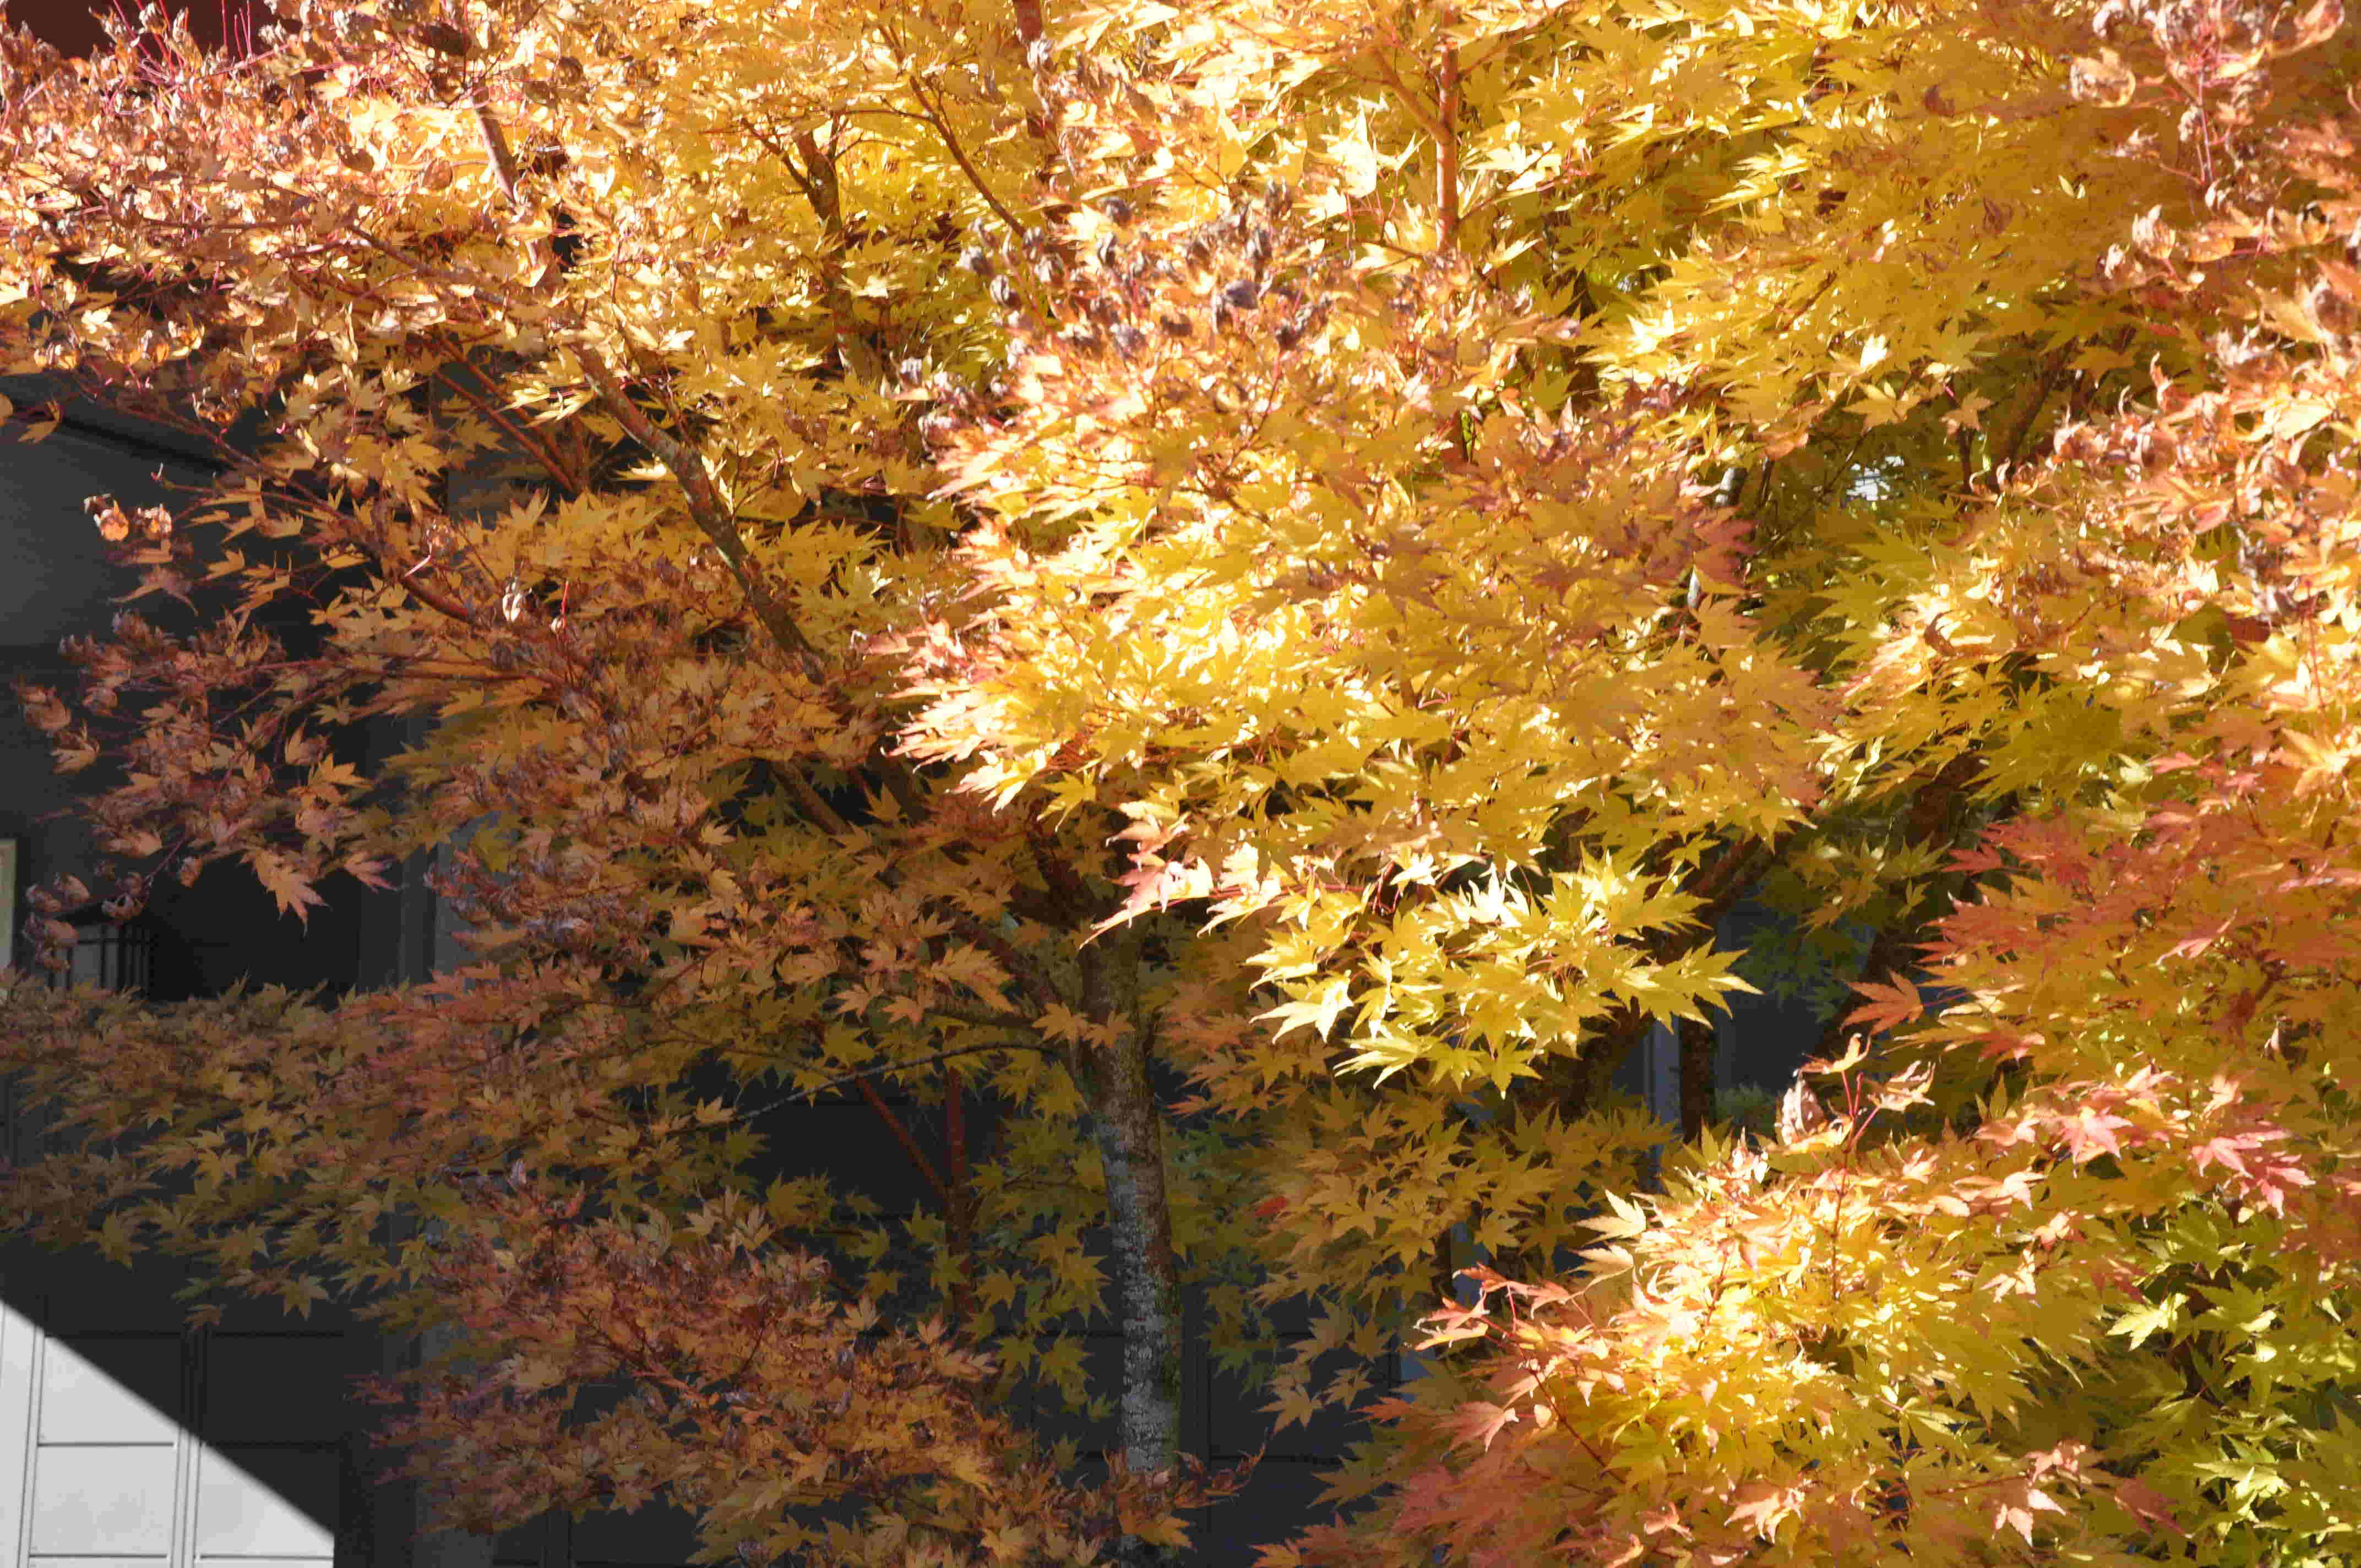
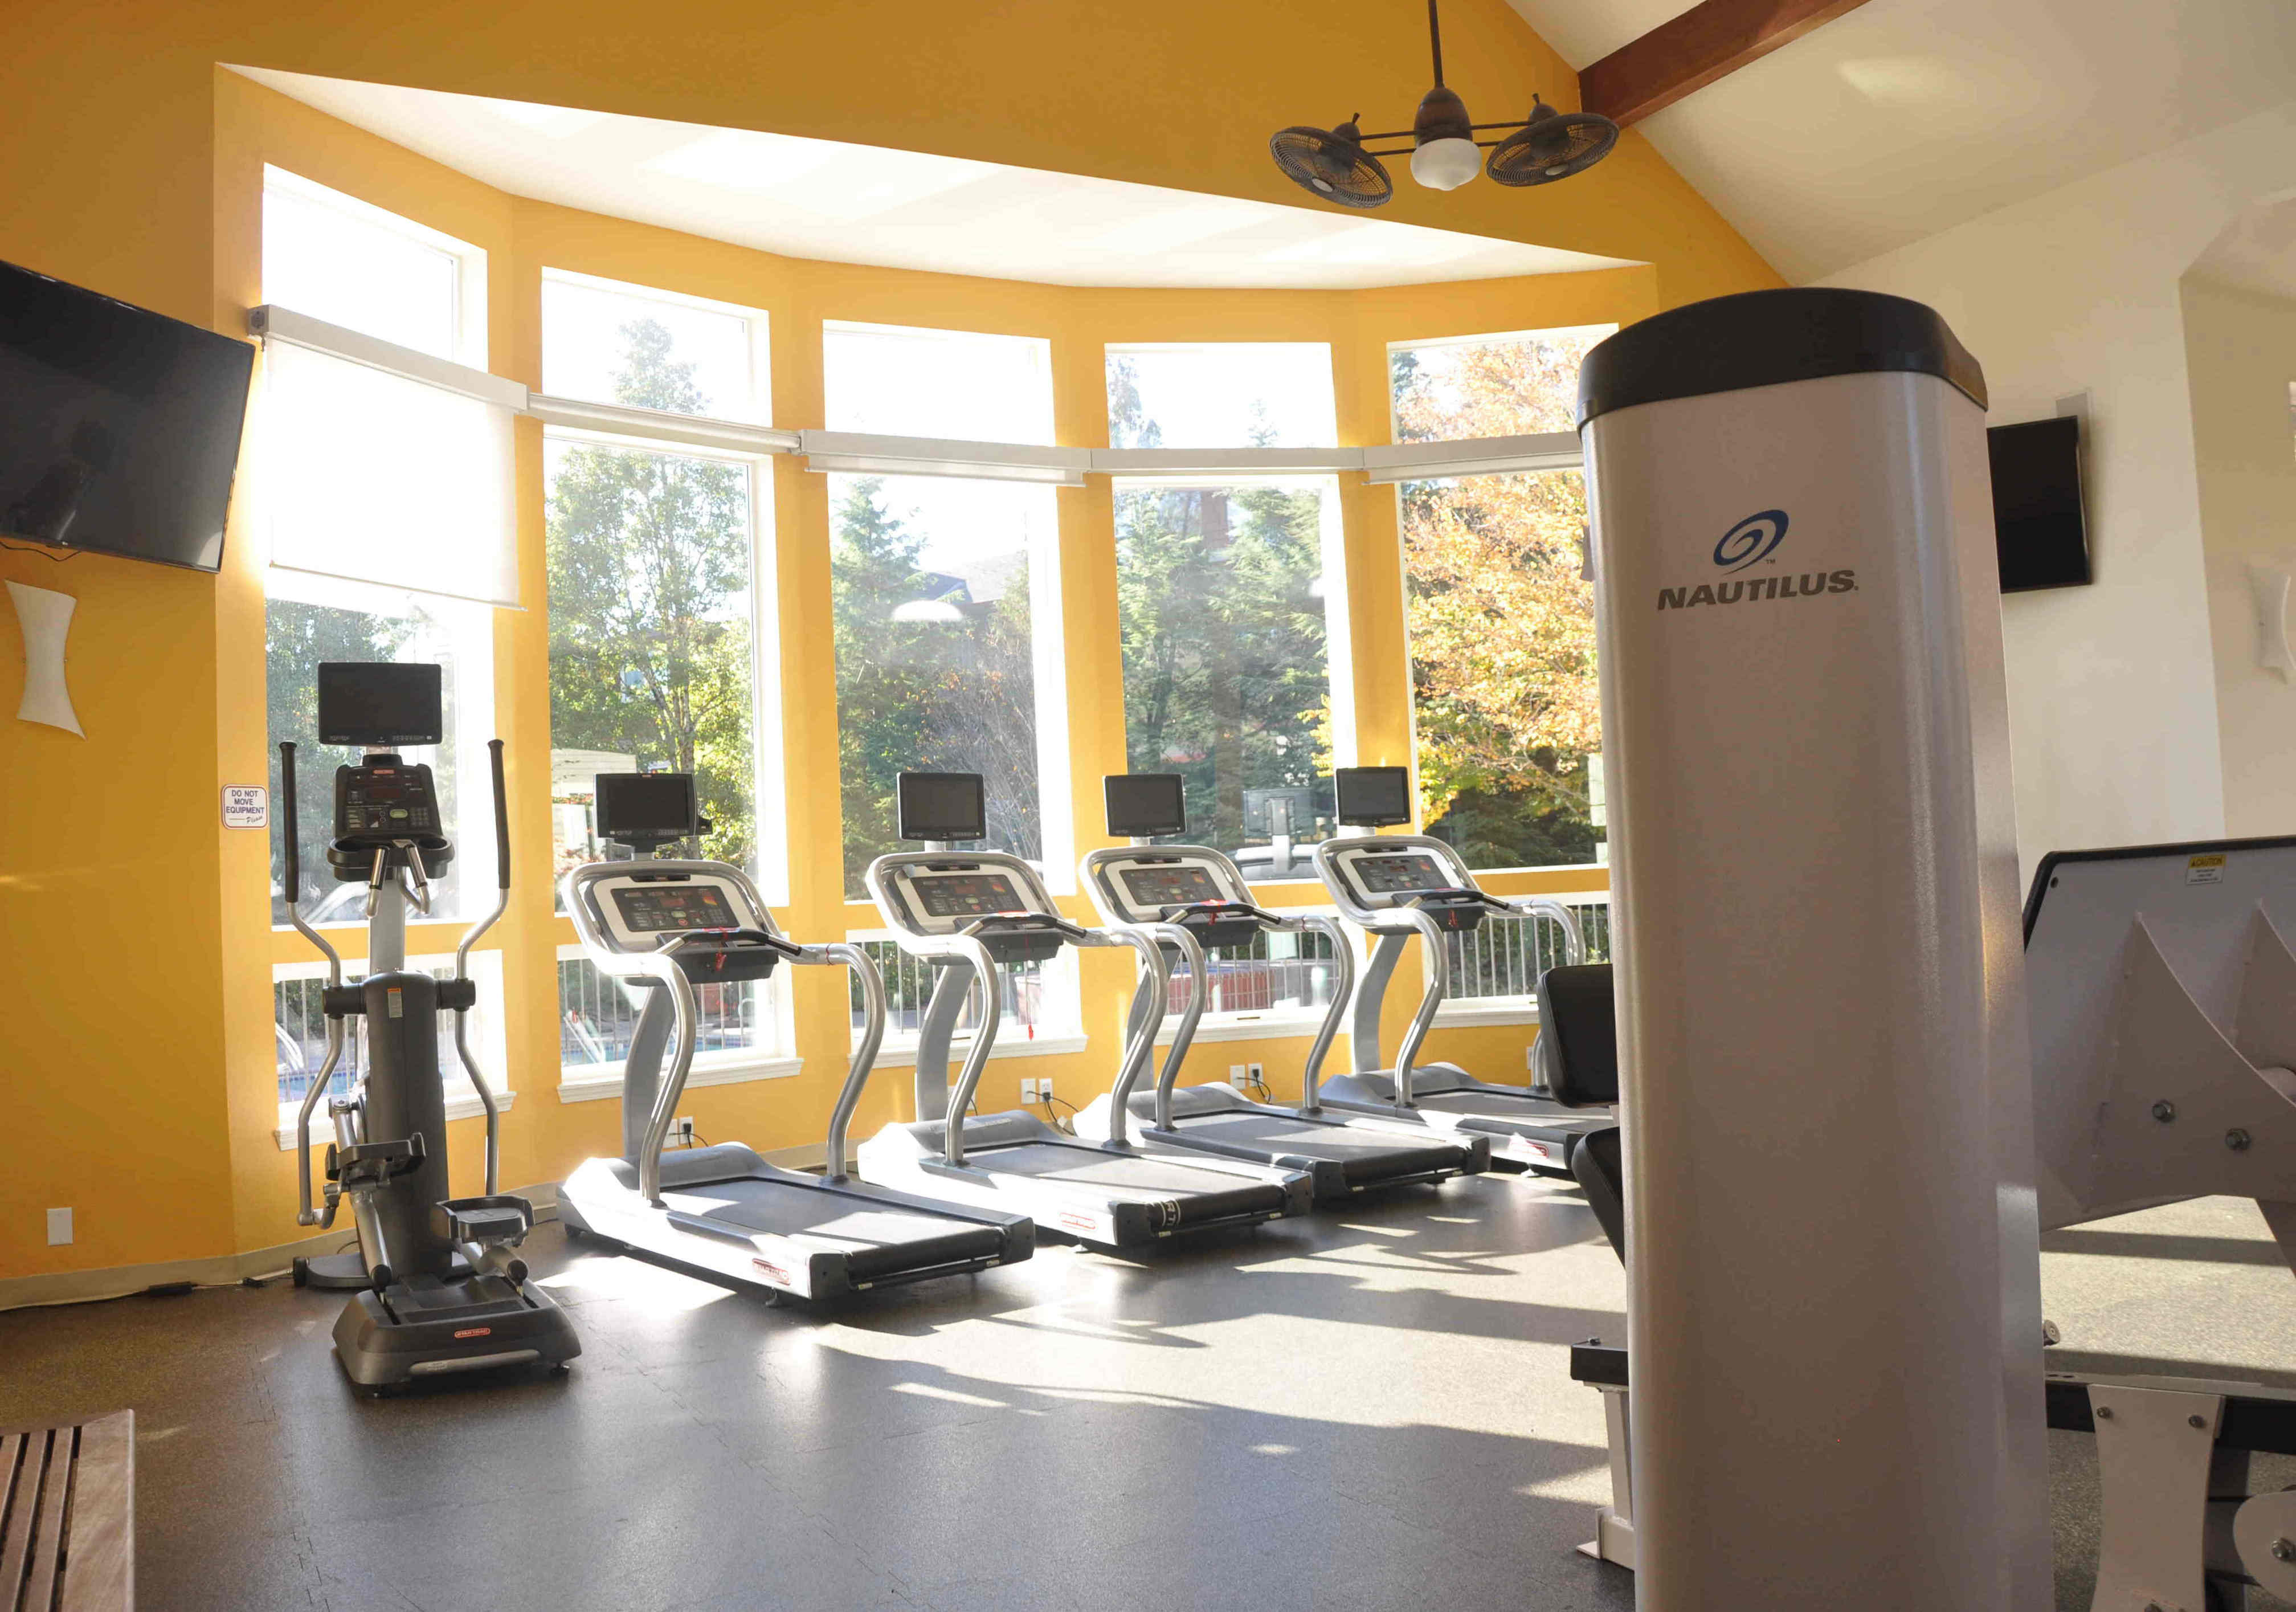
Here’s an Example of a Normally exposed Photo:
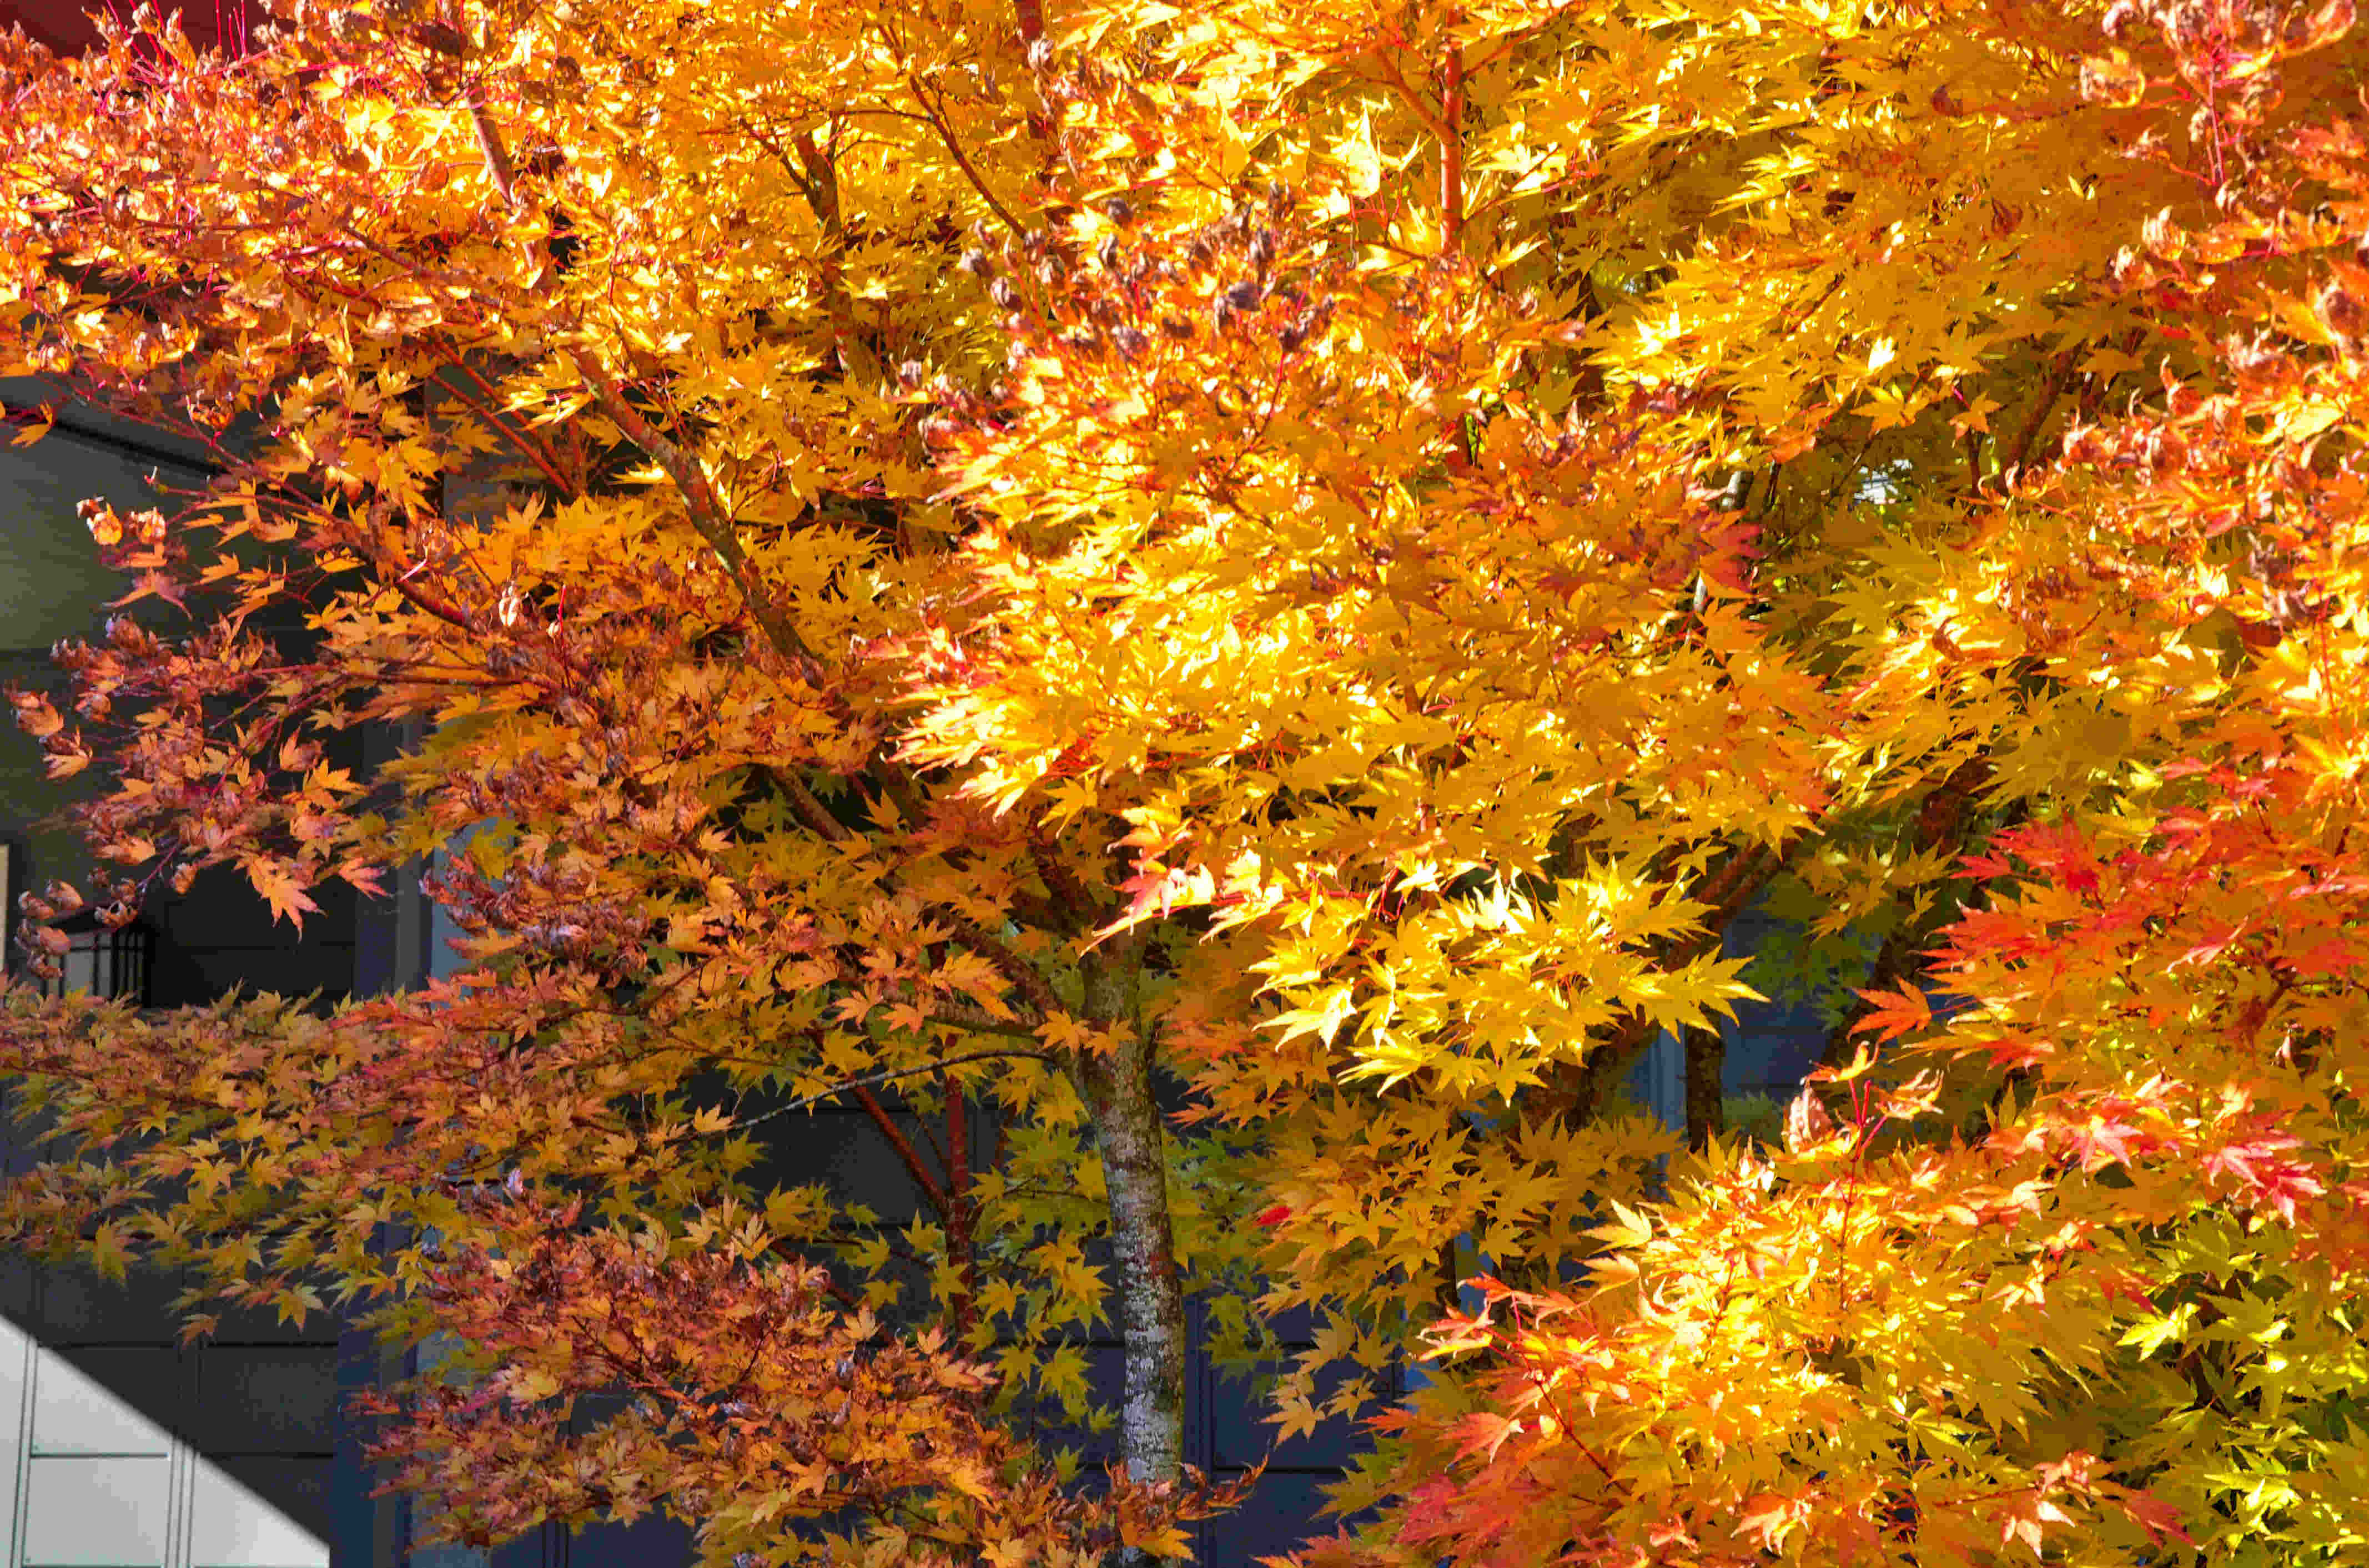
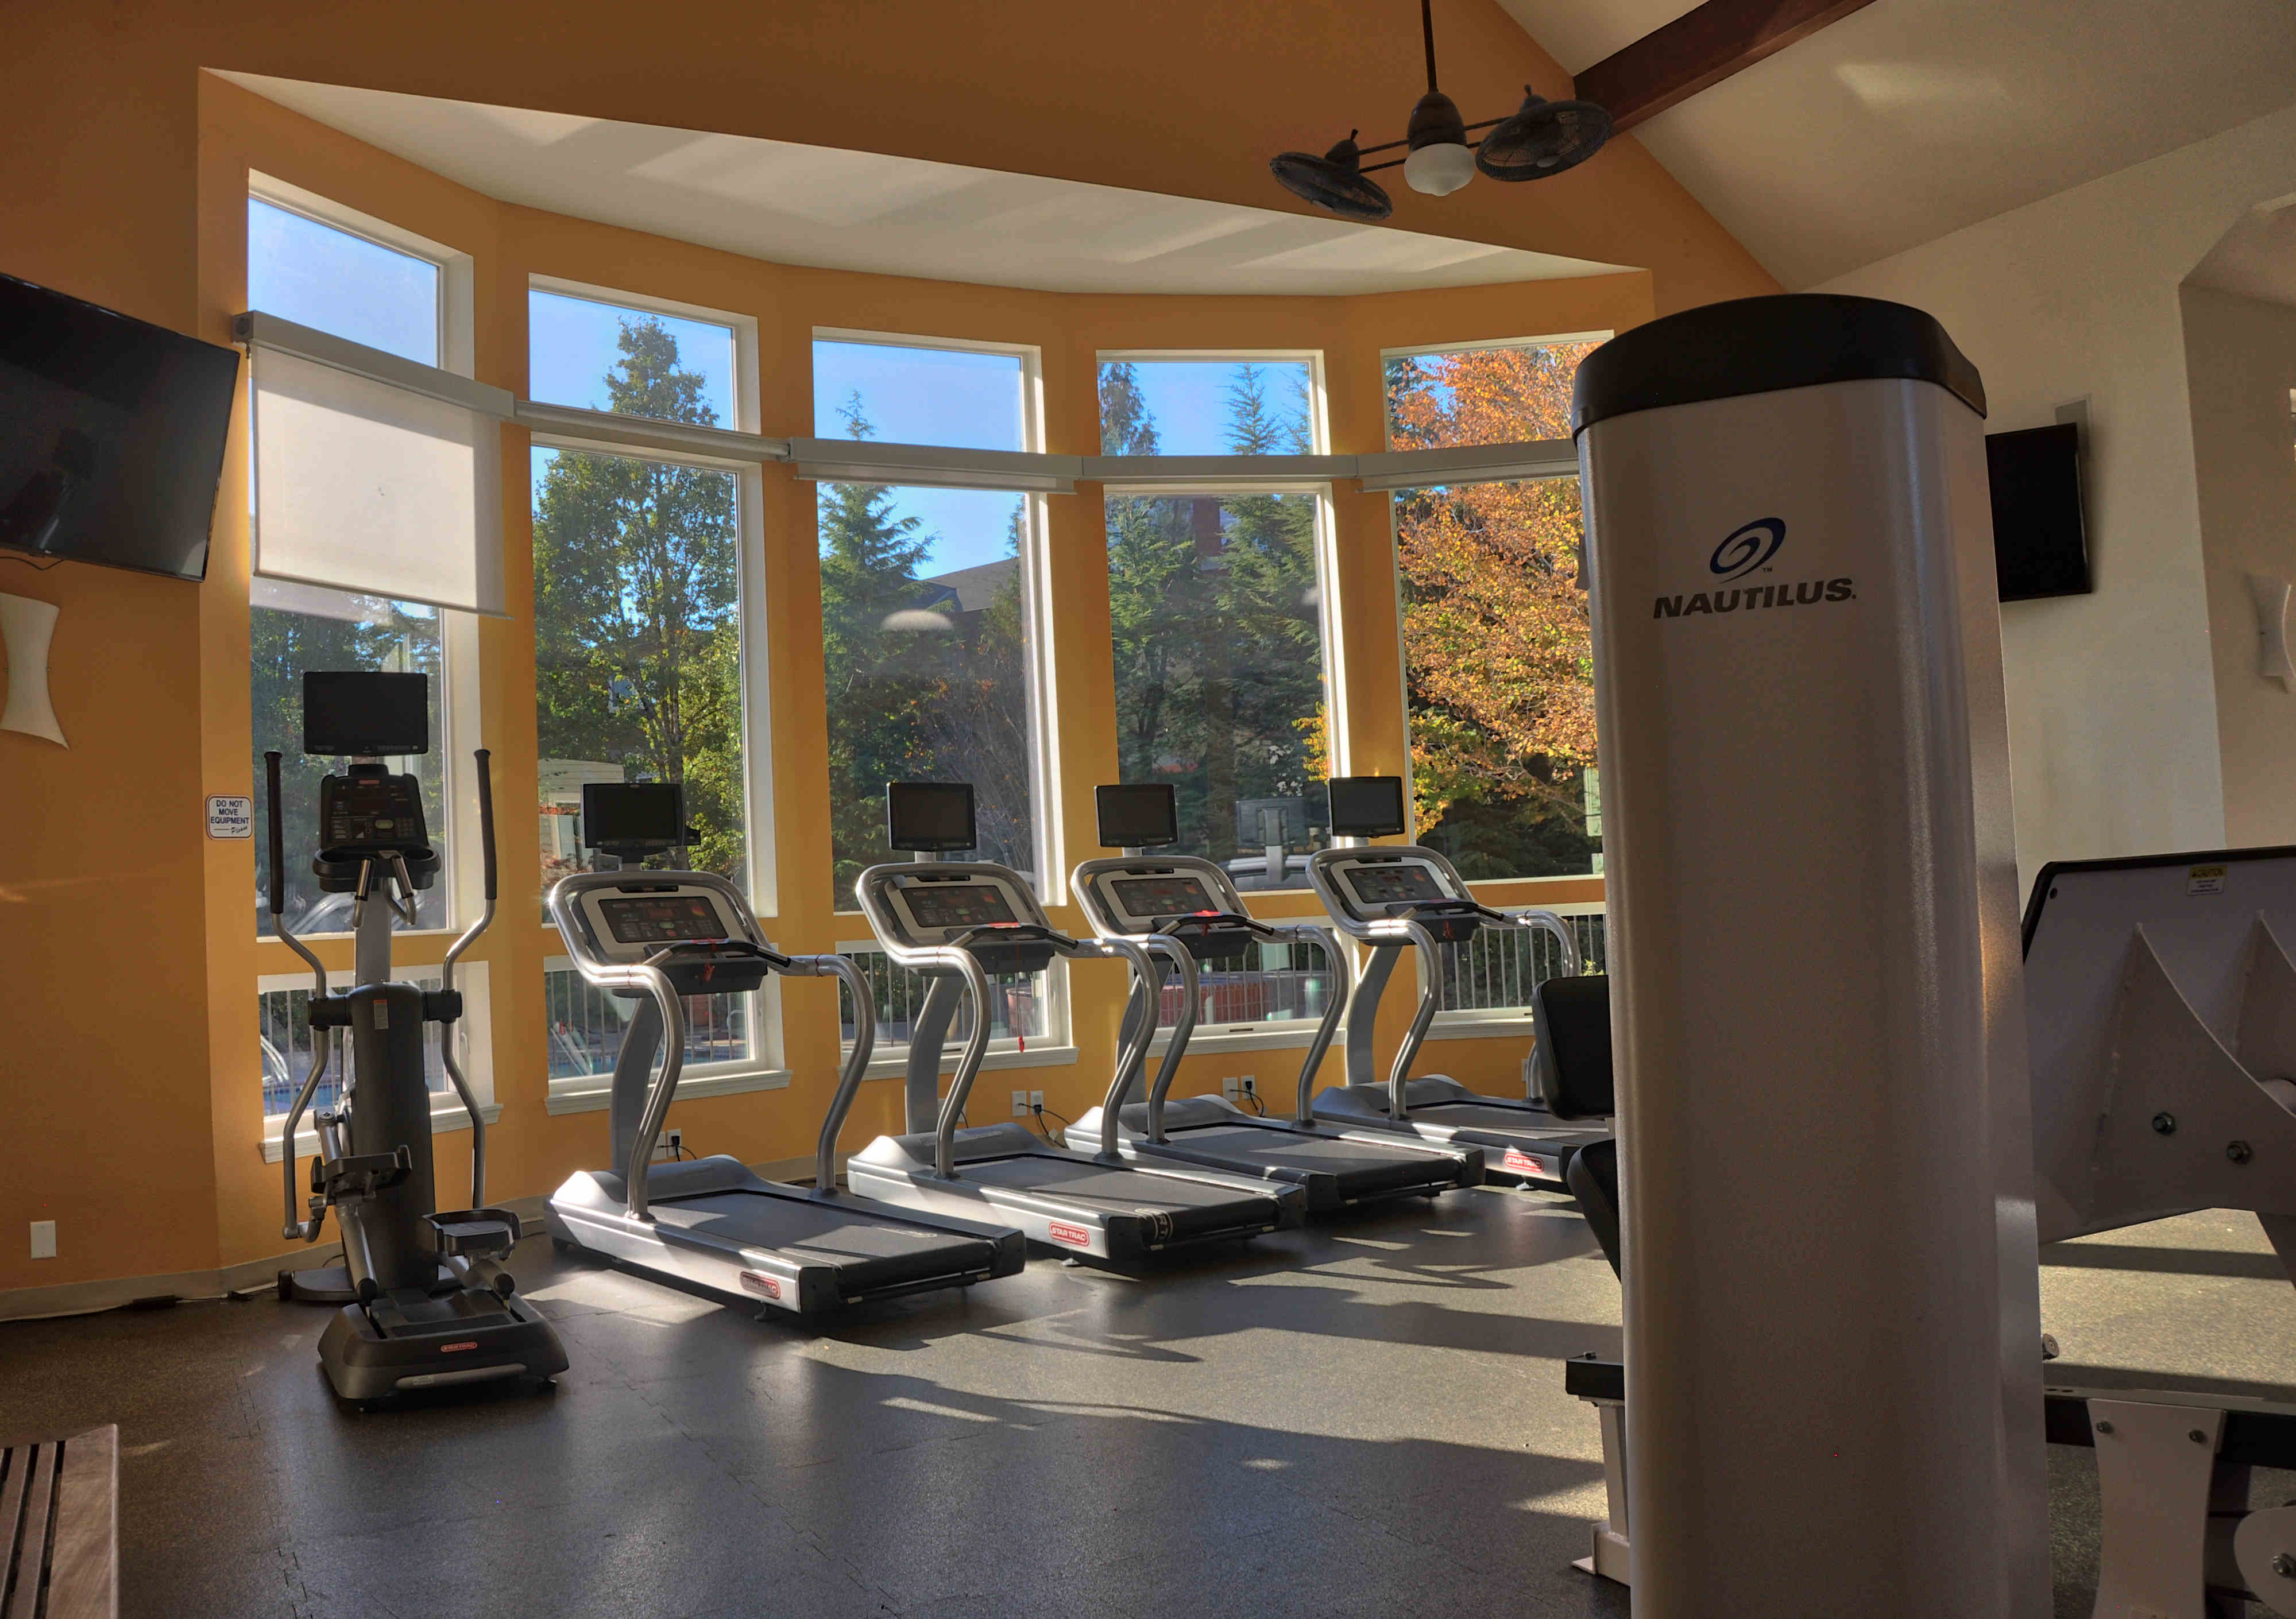
Here’s an Example of that same photo processed with HDR software:
What is HDR Video?
For the sake of simplifying a much more complicated process than still photography, High Dynamic Range video is, at least to the end viewer, HDR photography concepts applied to moving images. When viewing on an HDR capable screen, there is a much greater range of detail available in the lightest and darkest areas of the picture.
The obvious complication is that standard video frame rates start at 24 frames per second and can go up from there. Since, for example, a 2 hour feature film has over 172,000 unique frames, you can start to understand the sheer magnitude of capturing and processing a movie in HDR. Of course this is an area of quickly evolving technology so check in with us for updates.
What is an HDR TV?
There’s a lot to understand or at least be aware of with new TV technology. You may have heard some of the buzzwords like 4K, Ultra HD, OLED, Dolby Vision, HDR 10, etc. Be aware that not all new TV’s, even the high resolution versions, are capable displaying HDR content.
On top of this, there is currently a limited amount of HDR content available since it has to be produced with HDR in mind (kind of like 3D) and, being a new technology, content providers are just starting to get on board. Unlike 3D, which has turned into kind of a bust in home video terms, most producers feel that HDR is a concept that’s here to stay and will become a de facto standard for future production.
When shopping for an HDR compatible set the safest way to go for the moment is to look for the “Ultra HD Premium” logo on the box.
![]()
This is a standard that the biggest manufacturers, broadcasters and film producers have adopted to identify a TV with the right specifications to display an HDR image.
What does Dynamic Range really mean?
While I’ll generally try to stay away from things that are too technical, there are a few concepts that are necessary to understand before you can really dive into HDR.
In basic photography terms, dynamic range is the difference between the darkest and lightest tones in an image, generally pure black and pure white.
Dynamic range is measured in “stops”. An increase of one stop is equal to a doubling of the brightness level. Under ideal conditions the human eye can differentiate about 20 stops of dynamic range (although not all at once).
In practical terms this means that the darkest tones we can perceive at any one time are about 1,000,000 times darker than the brightest ones in the same scene. This is how you can still see details in dark shadows on a bright, sunny day.
Although technology is improving all the time, cameras still have a narrower dynamic range than the human eye. This is why when you take photos on a sunny day you often have to choose whether to blow out the highlights, making them pure white, or crush the shadows, making them pure black in the final image. In both cases any discernible detail is gone on one end or the other.
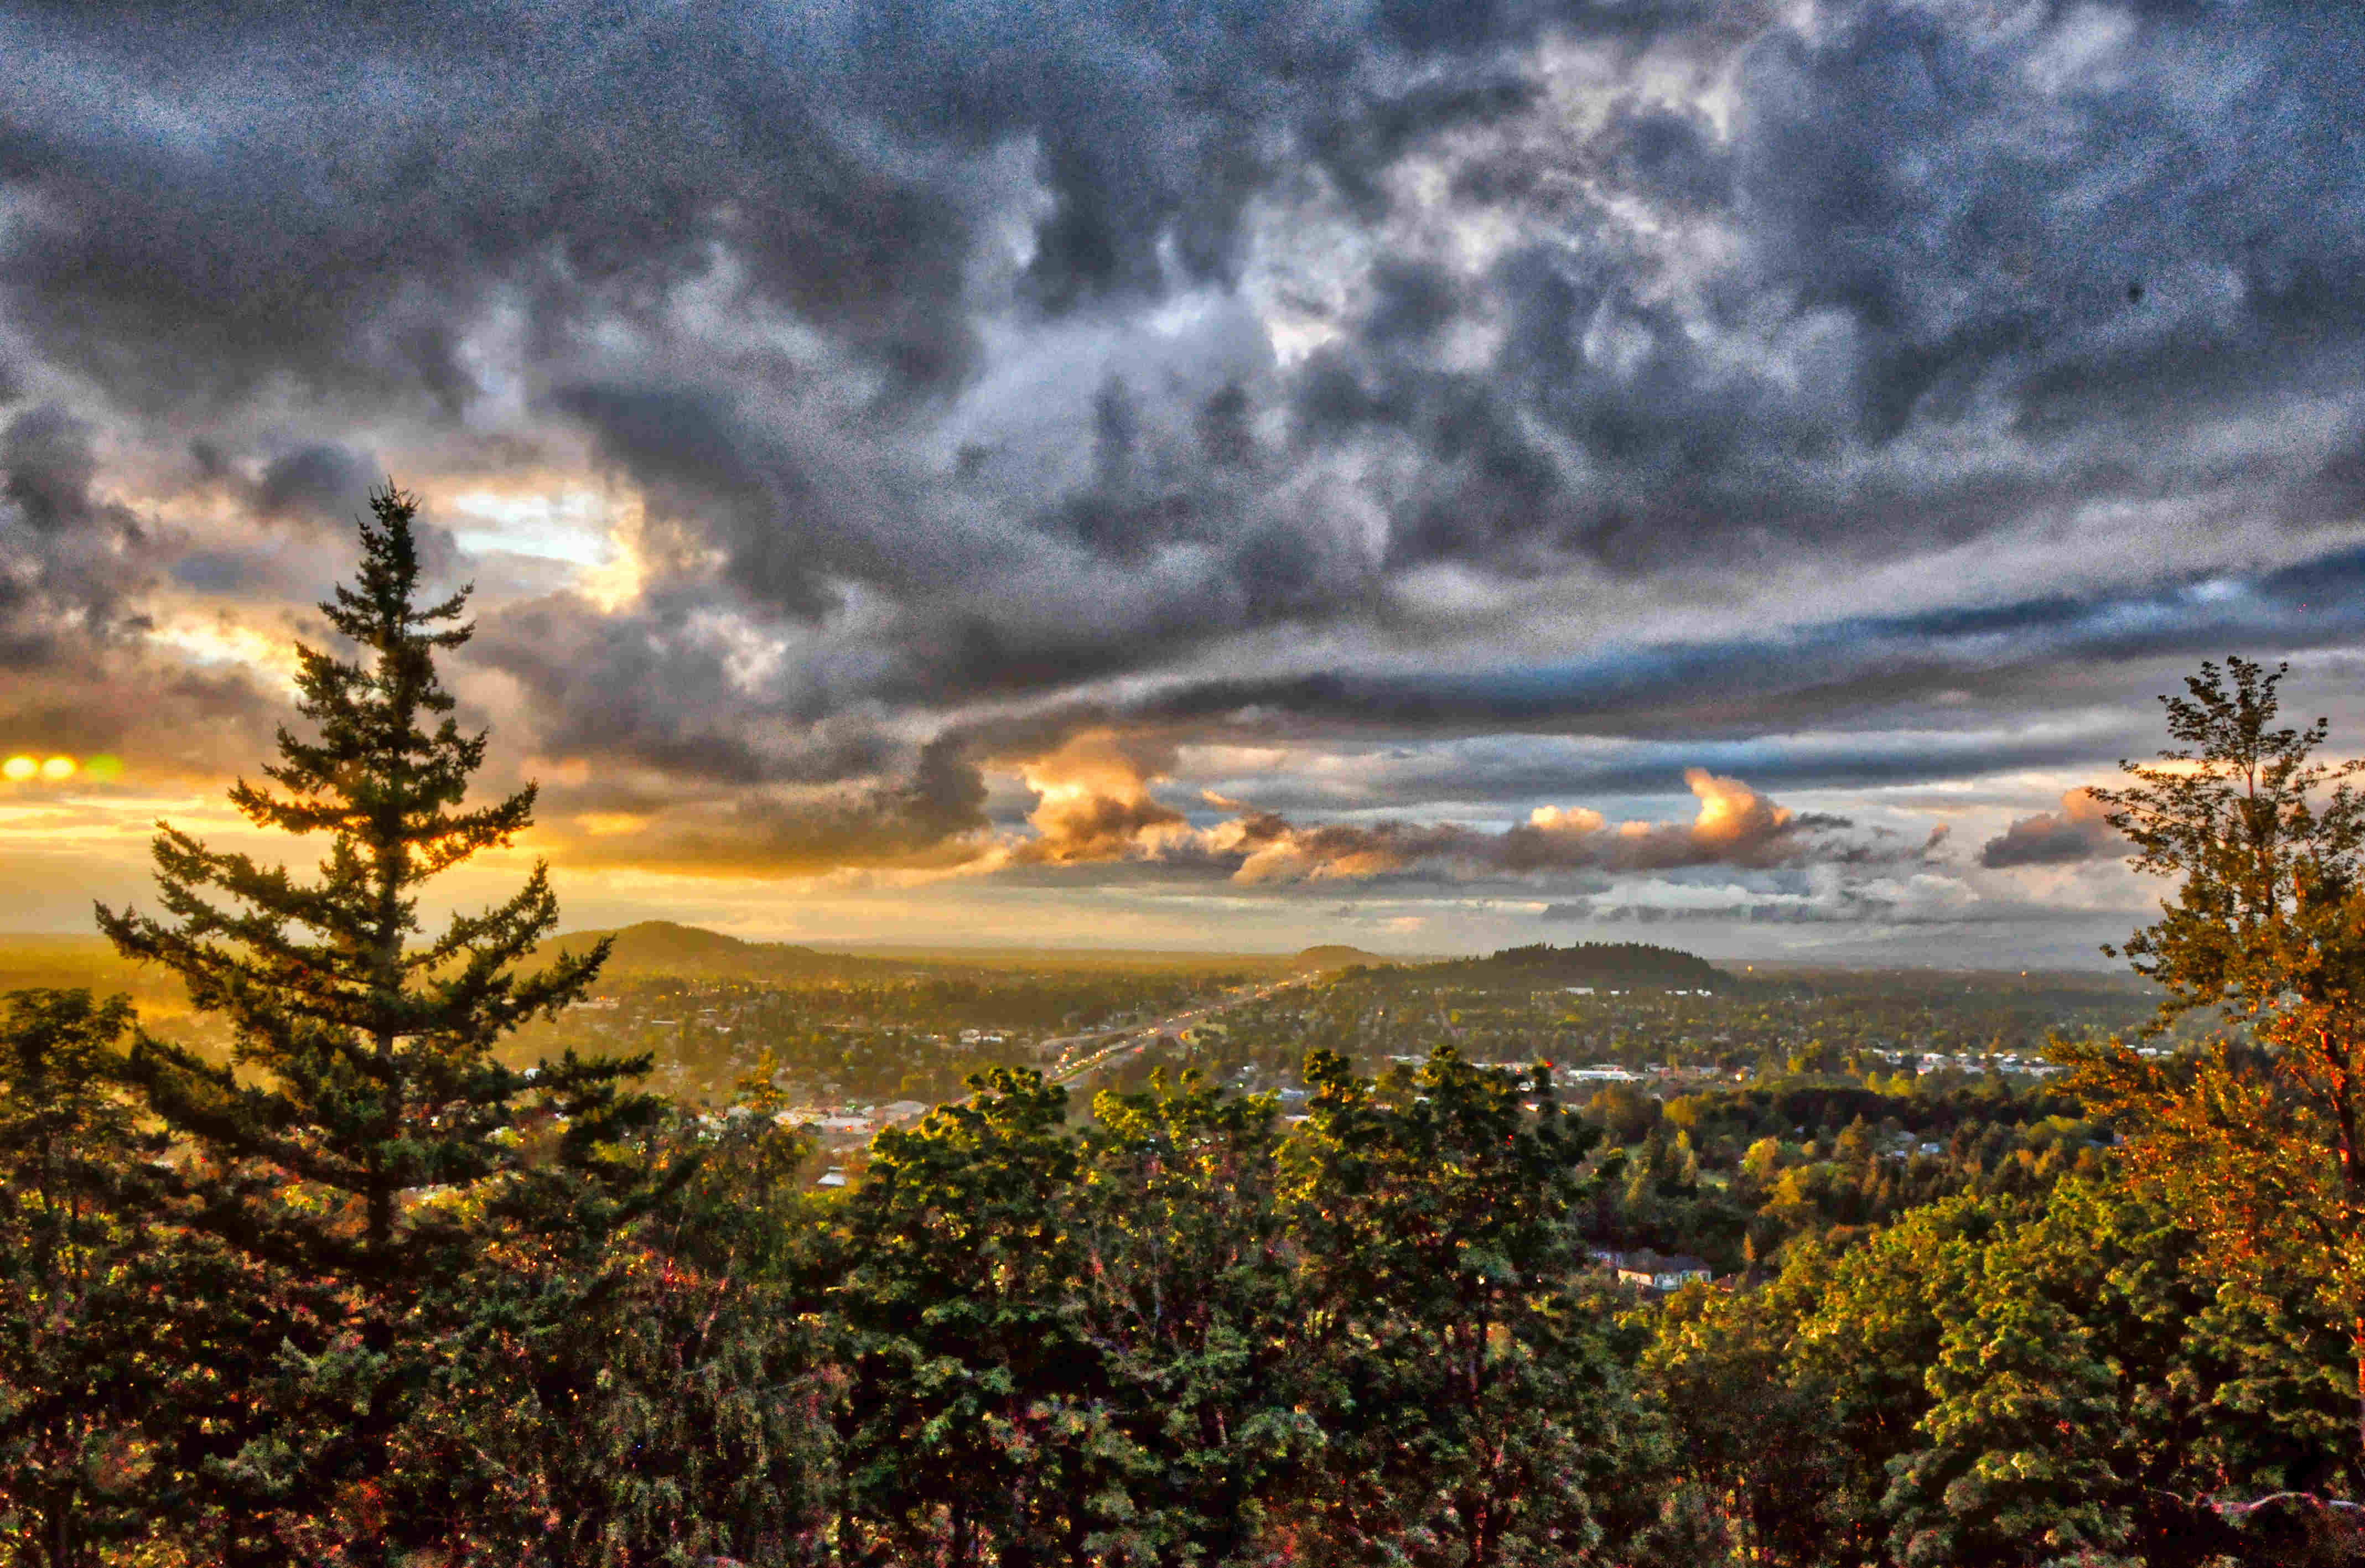
Think back on some of the pictures you’ve taken in the past. Maybe an indoor portrait of someone standing in front of a bright window. Or maybe a landscape shot with really cool looking clouds with the sun just breaking through.
Chances are, in either of these examples, you had to sacrifice detail in one aspect or another of the shot. If you wanted to see a properly exposed person in front of a window in all likelihood you’d see nothing but a bright blown out white spot where the window is. With the landscape, to really see the subtle (or dramatic) contrast in the clouds, the golf course it’s looking down on would probably be dark and muddy looking.
How do I get started with HDR Photography?
Let’s start with the very basics and we’ll dig deeper as we go. There will be lots of caveats to the following but go with me for the moment.
Here is Exactly How to Start Shooting HDR Photos:
- Step #1: Get a camera capable of shooting brackets.
- Step #2: Get a decent tripod.
- Step #3: Get a software program for compositing HDR images.
- Step #4: Get up the camera on the tripod and pick a shot…maybe a simple landscape to get started. Ideally there will be some interesting detail in both the lightest and darkest areas of the shot that might not show up well with an average exposure. Cool looking clouds are always a good place to start.
- Step #5: Put your camera in Aperture Priority Mode. More on this later.
- Step #6: If your camera isn’t capable of automatically shooting brackets, you’ll want to shoot 3 identical frames. One “properly” exposed, one 2 stops overexposed and one 2 stops underexposed.
- Step #7: Import the frames into your chosen software program and follow the instructions.
- Step #8: Rinse and repeat. Simple!
What Are HDR Brackets?
Whoa! For starters, what the heck are HDR brackets?
First things first since bracketing is a key concept in HDR. Fundamentally, shooting brackets just means shooting the same thing multiple times with different camera settings, usually with the intent of creating a range of different exposures.
The goal is to get a set of images that collectively contain maximum scene detail from light to dark. Normally HDR images are made from either 3 or 5 brackets although both more or less can sometimes be used.
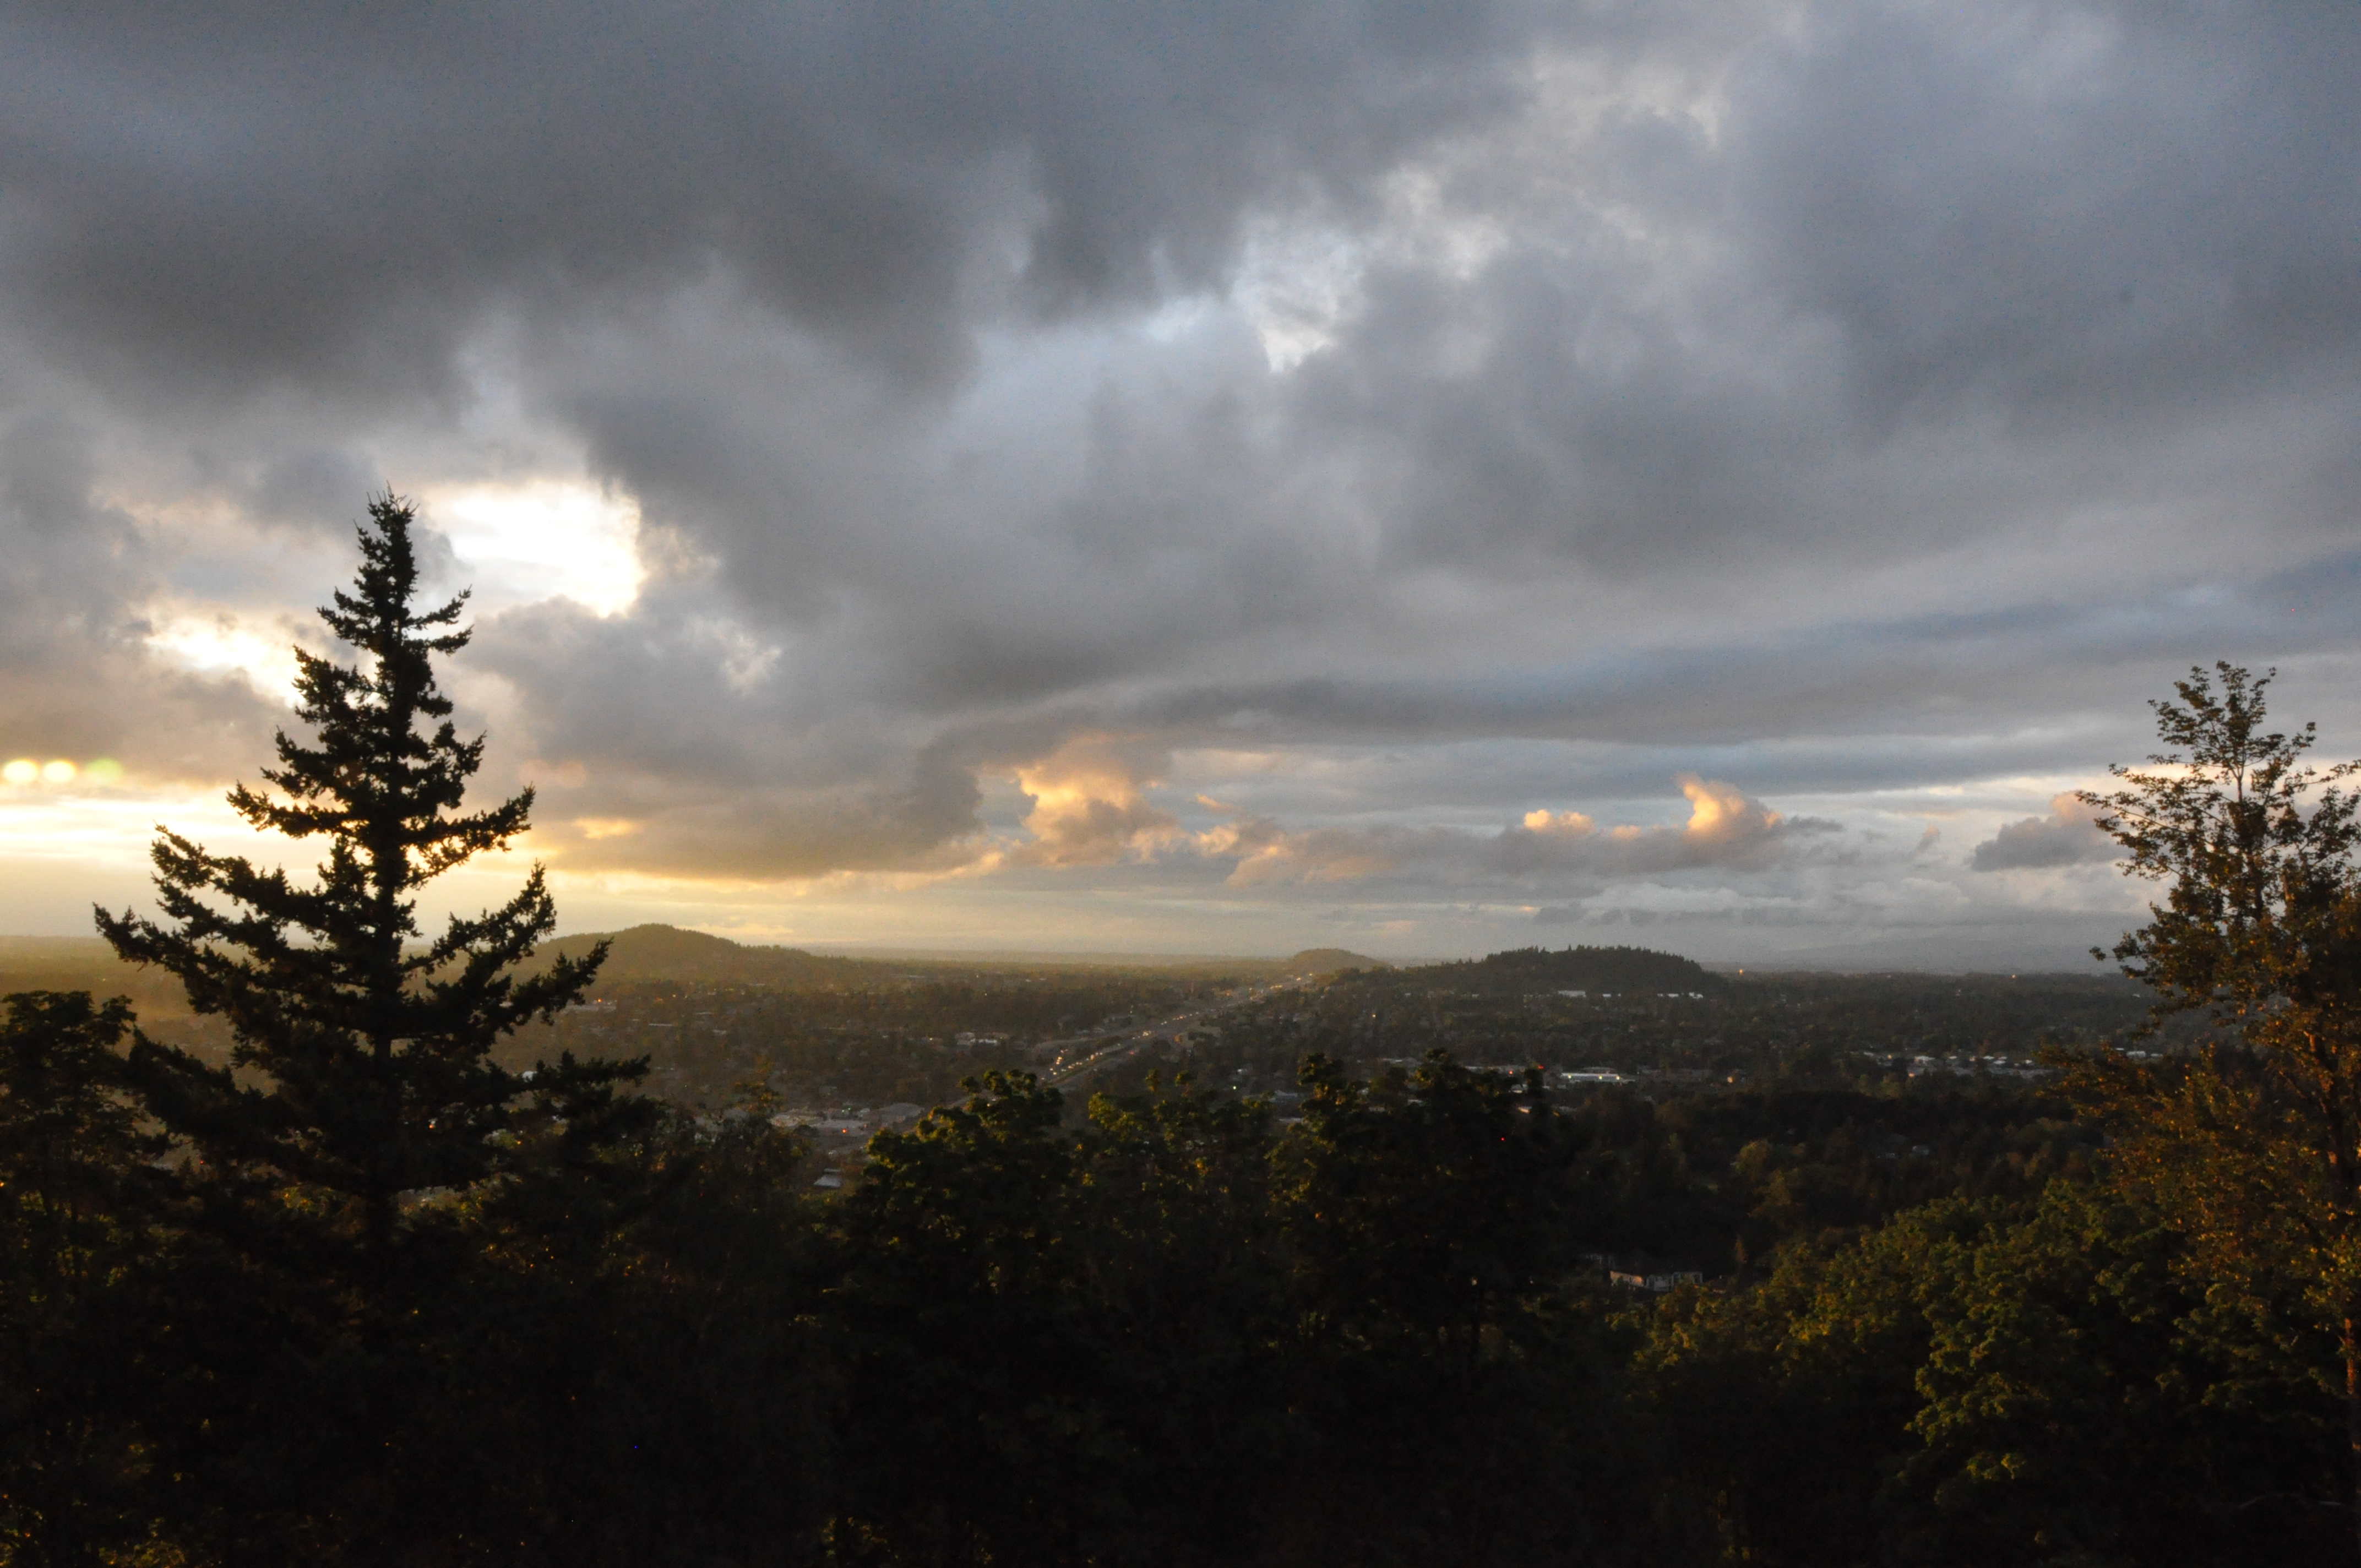
2 Stops Underexposed
“Normal” Exposure
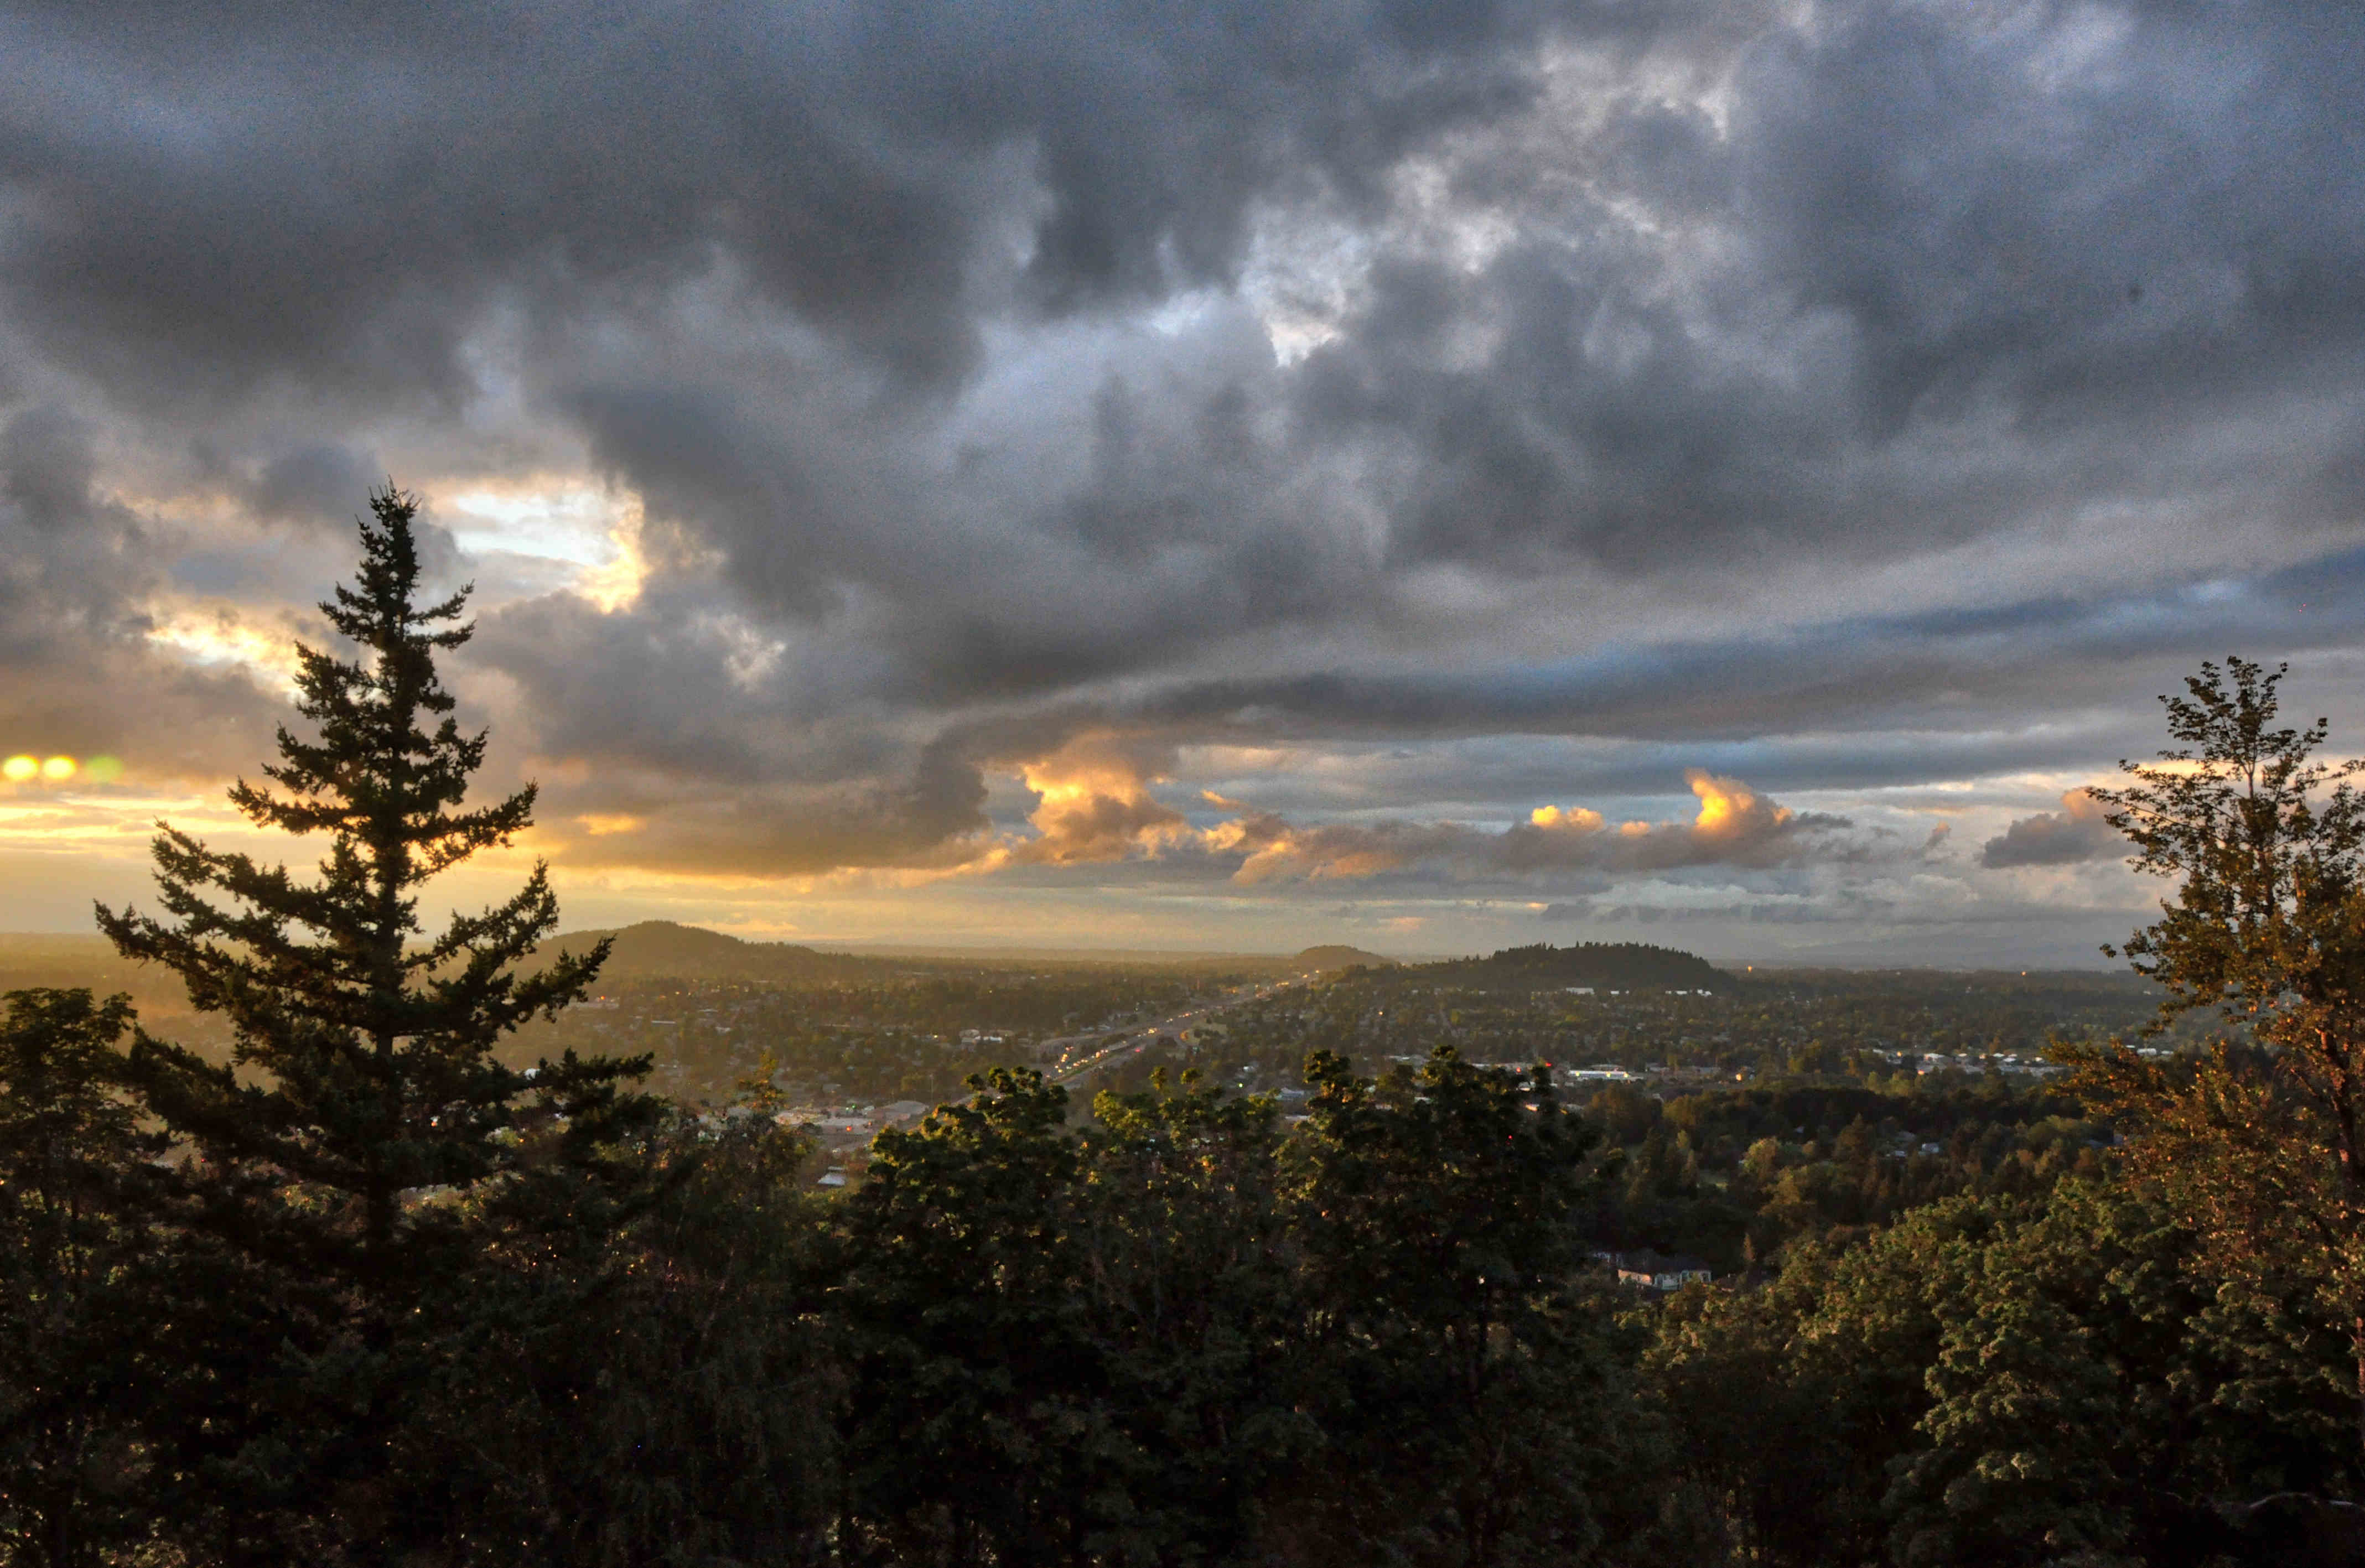
2 Stops Overexposed
HDR Processed
OK I understand that much. How do I find a good HDR software program?
In terms of software, we’ll get into much more detail about the different programs out there later but the short answer is that any mainstream HDR software will probably do the job. Photomatix is one of the most well known, and was one of the pioneers of HDR, so I’d suggest starting there with their free trial.
Most programs will allow you to do a group import on your bracketed frames, choose from a couple of general parameters and spit them out with a choice of preset “looks”. Chances are you can figure out how to get a half decent HDR image within 10 minutes of starting out. From there you’ll be able to dig deeper into the individual tool sets and fine tune your shot in myriad different ways. Or not…
Why do I need a tripod?
Although It’s possible to create HDR images without a tripod, your results will almost always be better shooting from a stable platform. In the compositing process, having frames that are as close to identical as possible is key and even those with a very steady hand can introduce camera shake when shooting handheld.
Most software programs have tools to help correct for minor camera shake from handheld brackets but the less you have to rely on them the better.
Will “serious” photographers make fun of me when I talk about HDR?
There are a lot of people who think of HDR as more of a gimmick than a technique and that it has no place in “legitimate” photography. With that in mind, there are probably lots of “serious” photographers who may look at you with scorn, condescension and derision if you try to talk to them about HDR.
Admittedly, HDR is one of the more abused techniques out there and used inappropriately can create some highly forgettable if not downright artistically offensive results. Any tool in the hands of someone without a good sense of basic photography principles can lead to some pretty ugly stuff.
For instance, here’s a normally exposed frame followed by a set of “reasonably” processed HDR brackets and then an example of what you can do with a heavy hand on the controls:
“Normal” Single Frame Exposure
3 Bracket HDR Composite: “Reasonable”
3 Bracket HDR: “What Were You Thinking?”
Look no further than this Reddit Thread for more horrible HDR.
On the other hand, photography is fundamentally an art form and any image that gets my attention can’t be all bad. I’ve seen HDR used properly and creatively in a way that made for some highly memorable results.
On average I’m a fan of the HDR look when done well. I think it can add a degree of interest and detail that I enjoy.
Trey Ratcliff is one of the pioneers of HDR, and just taking a look around his site Stuck in Customs is enough to show you what’s really possible with HDR.
I suppose the bottom line is that beauty is in the eye of the beholder and there’s often an audience for even questionable applications.
There are also beginning to be more practical uses for HDR such as real estate photography.
Can I create an HDR image from a single photo or do I have to use brackets?
The answer is “sort of” and “not necessarily”. Creating a true HDR image requires the merging of multiple differently exposed frames so you can’t get real HDR from a single frame. However…
- 1) You can use the tone mapping feature of most HDR programs to enhance a single frame and get an HDR kind of look, but it won’t be nearly as detailed or impressive.
- 2) You can use RAW files to create brackets from a single frame.
Here is our tutorial on How to Create HDR Brackets from a Single Raw Image
More confusing jargon. What is a RAW File?
RAW is simply a file type, like a JPEG. But, where a JPEG photo is considered a photograph, a RAW file is more like a digital negative which hasn’t been processed or adjusted by the camera. This leaves all the retouching up to you.
RAW files contain much more picture information (and thus more data) than a JPEG file. For example, because of all the extra information stored in a RAW file, you’ll get much better results adjusting the exposure of a RAW file than a JPEG.
The downside to RAW files is that, because of all the extra information they contain, they take up quite a bit more storage than JPEGs (so stock up on SD cards, we recommend this one) plus they have to be digitally processed and converted to look good.
The upside, and here’s where HDR comes in, is that they contain enough picture information to be able to extract the equivalent of bracketed exposures from a single file. This requires a bit more work and also requires a photo editor like Lightroom or Photoshop to start the process.
By utilizing all the picture information available in a RAW file you can create images with multiple exposure levels, export them as individual images and then import into your HDR program as if they were real bracketed shots.
The results, although generally not as good as true brackets, can look pretty good and also eliminate the issues inherent in capturing multiple identical frames. This is particularly true of shots that might include motion within the frame.
If I create real brackets should I still shoot in RAW?
The advantages and disadvantages of shooting in RAW are the same whether you are after a single frame or a 9 bracket series. If you get really serious about the whole thing, shooting in RAW just gives you more control over the subtleties of your finished product. Lots of photographers wouldn’t think of shooting in anything but RAW.
On the other hand, there are probably even more of us who won’t necessarily want or need an extra 10,000 options when we just want to create a cool looking shot for our website or digital frame over the fireplace. This may be an instance where 10% of the work gets you 90% of the results.
You mention a 9 bracket series. Does this mean “more is better”?
This is probably another example of “how far do you want to take the process”. My opinion is that, for the average photographer, a 3 bracket series will almost always get you what you need. There are plenty of more serious photographers who regularly shoot 5 frames and a few hard core types go for even more.
Look up “point of diminishing returns” for more on this.
Can I just use all the “auto” settings on my camera when I shoot?
You might be tempted to just dial in an “all auto” kind of setting and let it rock. An important consideration that you may or may not be aware of though is the impact of the camera’s aperture setting and how it affects depth of field. Always remember that you want your brackets to remain as consistent as possible with the exception of exposure.
When you let an automatic setting adjust your aperture you can create subtle (or sometimes not so subtle) changes in focus depth. These focus differences can ruin an otherwise great HDR shot. In simplest terms a wider aperture, say f 2.8 creates a shallower depth of field or depth of focus than a higher one, say f 11. For more info on depth field click here.
Auto vs. Manual focus: Which is Better?
Another big temptation can be to leave your camera in auto focus mode. Don’t do it. While convenient, this can lead to problems, particularly when using a DSLR camera. As I’m sure you’ve experienced before, a camera in auto focus mode won’t always pick the same point to focus on. This can lead to unusable brackets.
When using a DSLR the problem can be compounded. Typically, a certain amount of physical inertia is generated by the camera as it focuses which can cause subtle framing changes, even when using a tripod.
How do I Process HDR Photos?
OK, I think I get the idea, but what do I do after I get my shots?
This is where the software end of things comes in.
Each HDR software program is unique, with it’s own tool set and workflow but in general terms here’s what the process looks like:
1) Capture your bracketed shots (I think we’ve pretty well covered this).
2) Import your brackets into your selected software program.
Most will let you batch your brackets together as you import them.
3) Review Pre-Merge Settings
Before you merge your photos together you’ll have some different options for aligning your shots as well as some other preprocessing tweaks like ghosting, chromatic aberration and noise reduction. More detail on those here.
If you’ve been using a rock steady tripod this will be a less important part of the process than if you’ve been shooting handheld because even small amounts of framing variation or “camera shake” can ruin an HDR shot.
Photomatix, for instance, actually gives you merge options for tripod and 3 different levels of movement from “minimal” to “large”.
Once your brackets are aligned (at least as much as the software is capable of) you’re ready to turn multiple images into one. Press Merge.
4) Edit the Photos.
Once your images are merged into a single composite you get into the guts of the editing process. Here you’ll find tool sets specific to each program (although they all have similarities). Most will provide you with a range of presets that give a you a specific look with the push of a single button.
This is the point at which you can make things as simple or complex as you like. Many will opt to click on a preset they like, click “finish” and call it a day. Others will want to tweak the image in a thousand different ways. Some of the tools are pretty standard photo editing tools (like brightness and contrast), and some are more specific to HDR. See these tutorials for more detailed information.
This all still sounds pretty complicated. Can’t I just use the HDR setting on my iPhone?
Since, as the saying goes, “The best camera to use is the one you have with you”, and since practically no one is without their phone these days the short answer is “absolutely”.
Of course there are several unique considerations here and a variety of things to keep in mind if you’re shooting HDR with your phone. Take a look at the HDR On Your Phone guide for more detail.
I’m a fan of Black and White photography. Does HDR work with B&W?
Sure! I’m a big fan of black and white myself! Let’s face it, there’s really no such thing as black and white photography anymore anyway, it’s all black and white processing and HDR is essentially just a sophisticated form of photo editing. Most HDR programs have tools as well as presets for creating cool black and white images.
There are no comments
Add yours